Squeezebox Keyboard
I designed and built a split ergonomic keyboard with some ideas I've been wanting to try for over a year. Here are the main features of the keyboard:
- Split design, obvs
- staggered linear columns
- customizable tailor fit column offsets
- tailor fit per-finger vertical offsets
- thumb cluster with 6 keys
The Home Corner
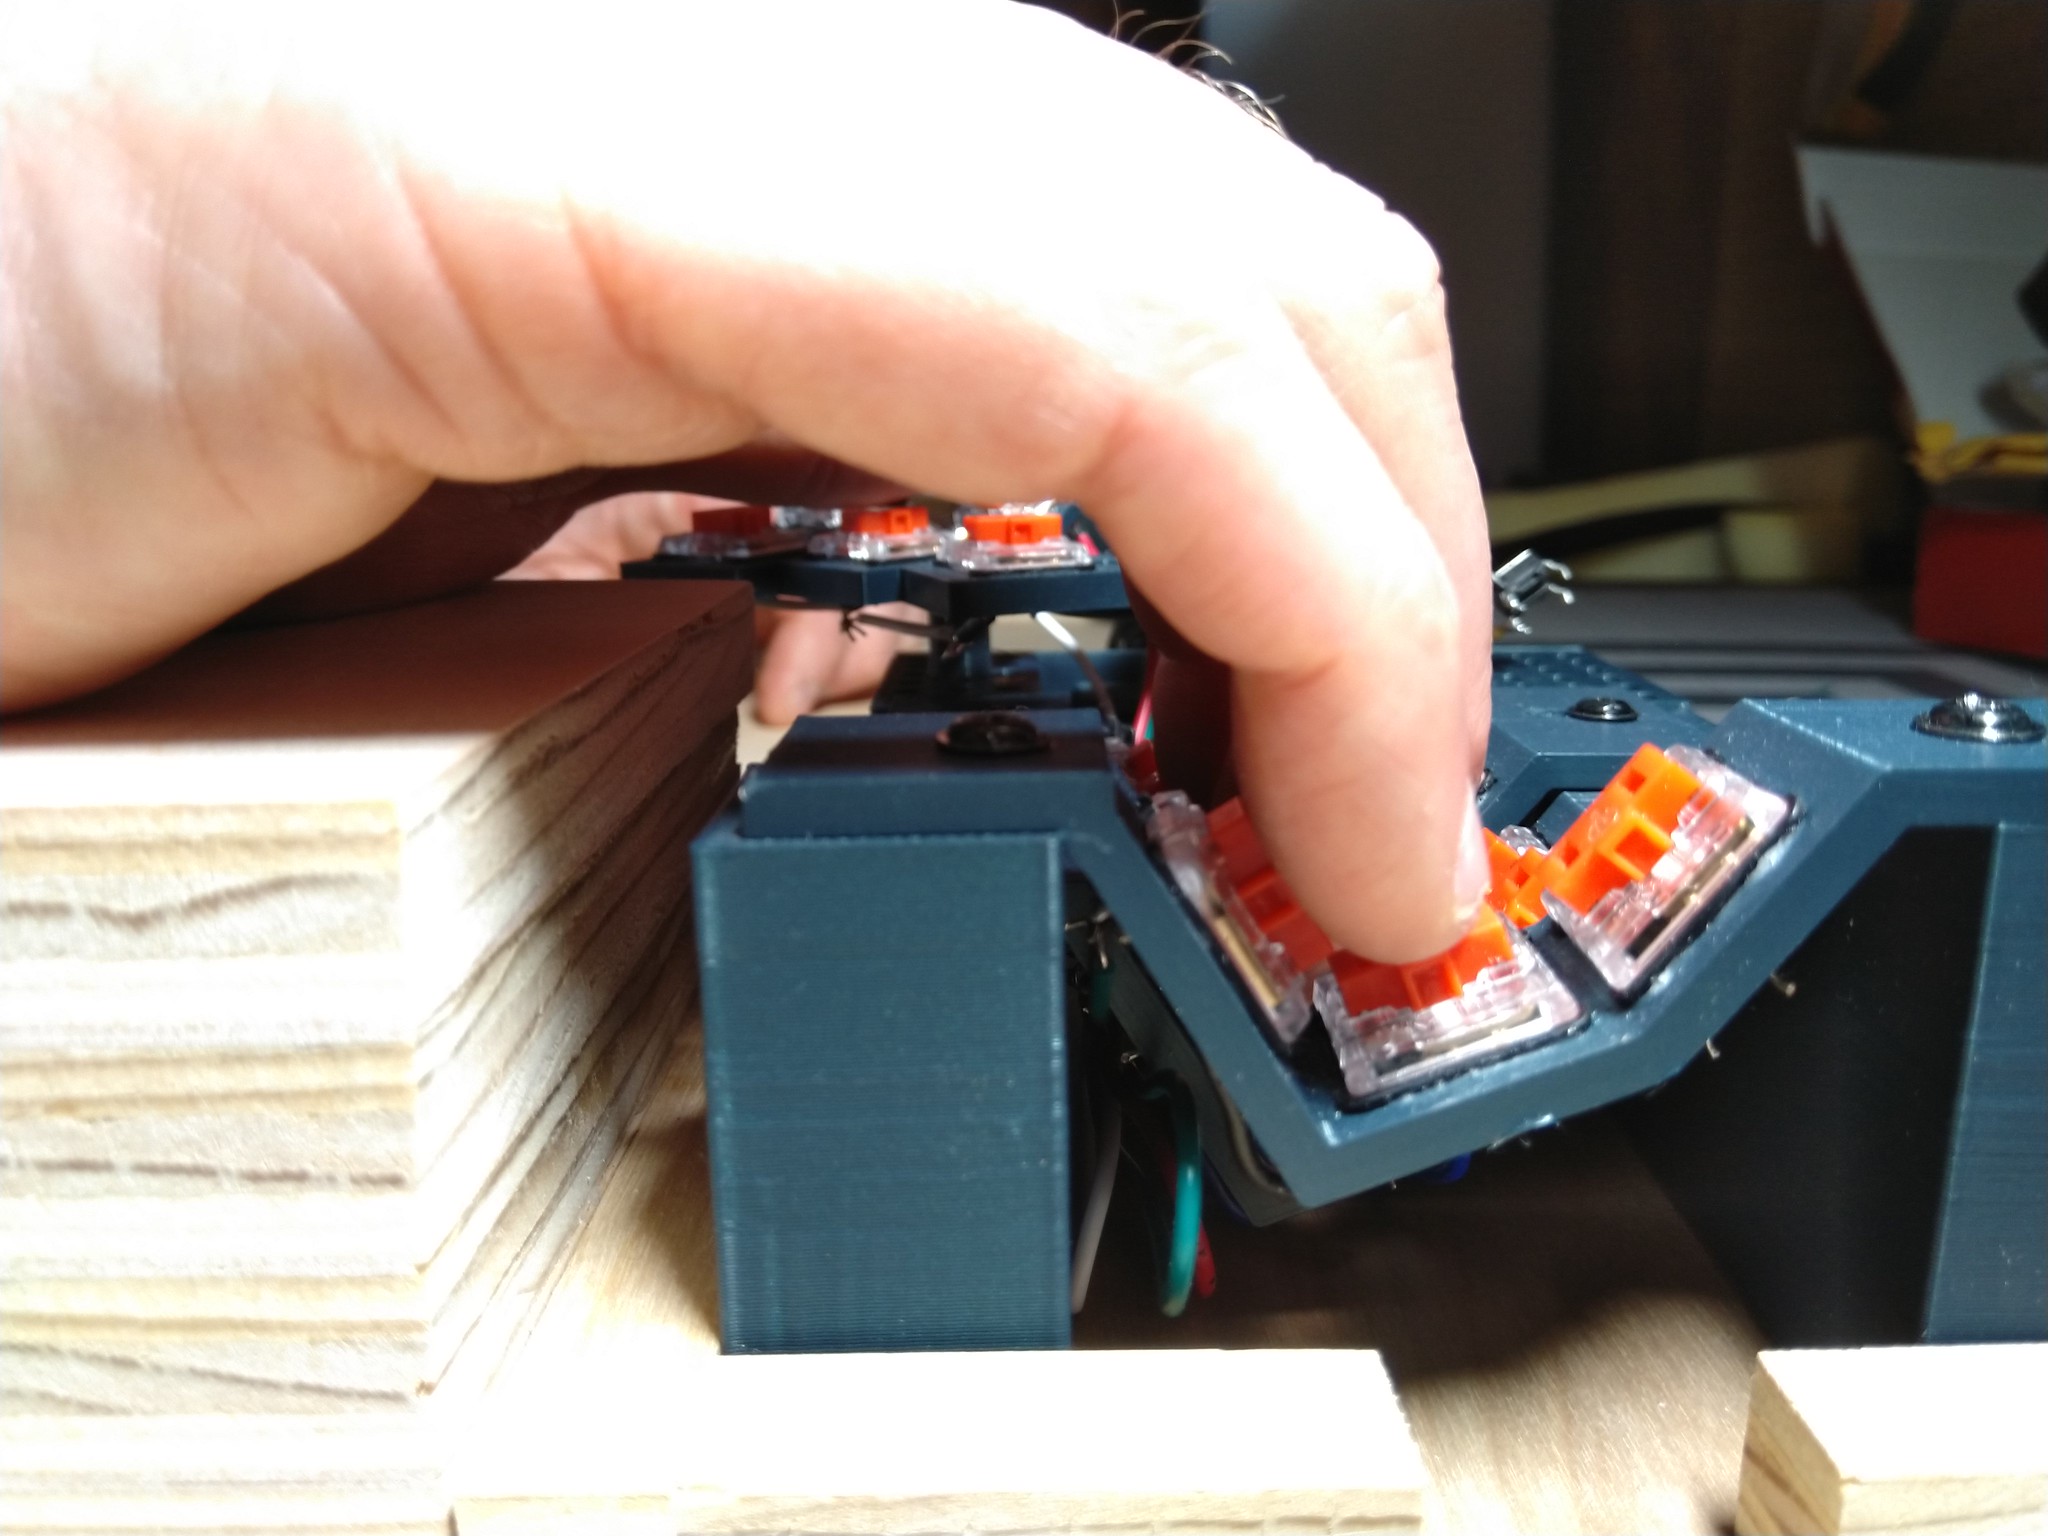
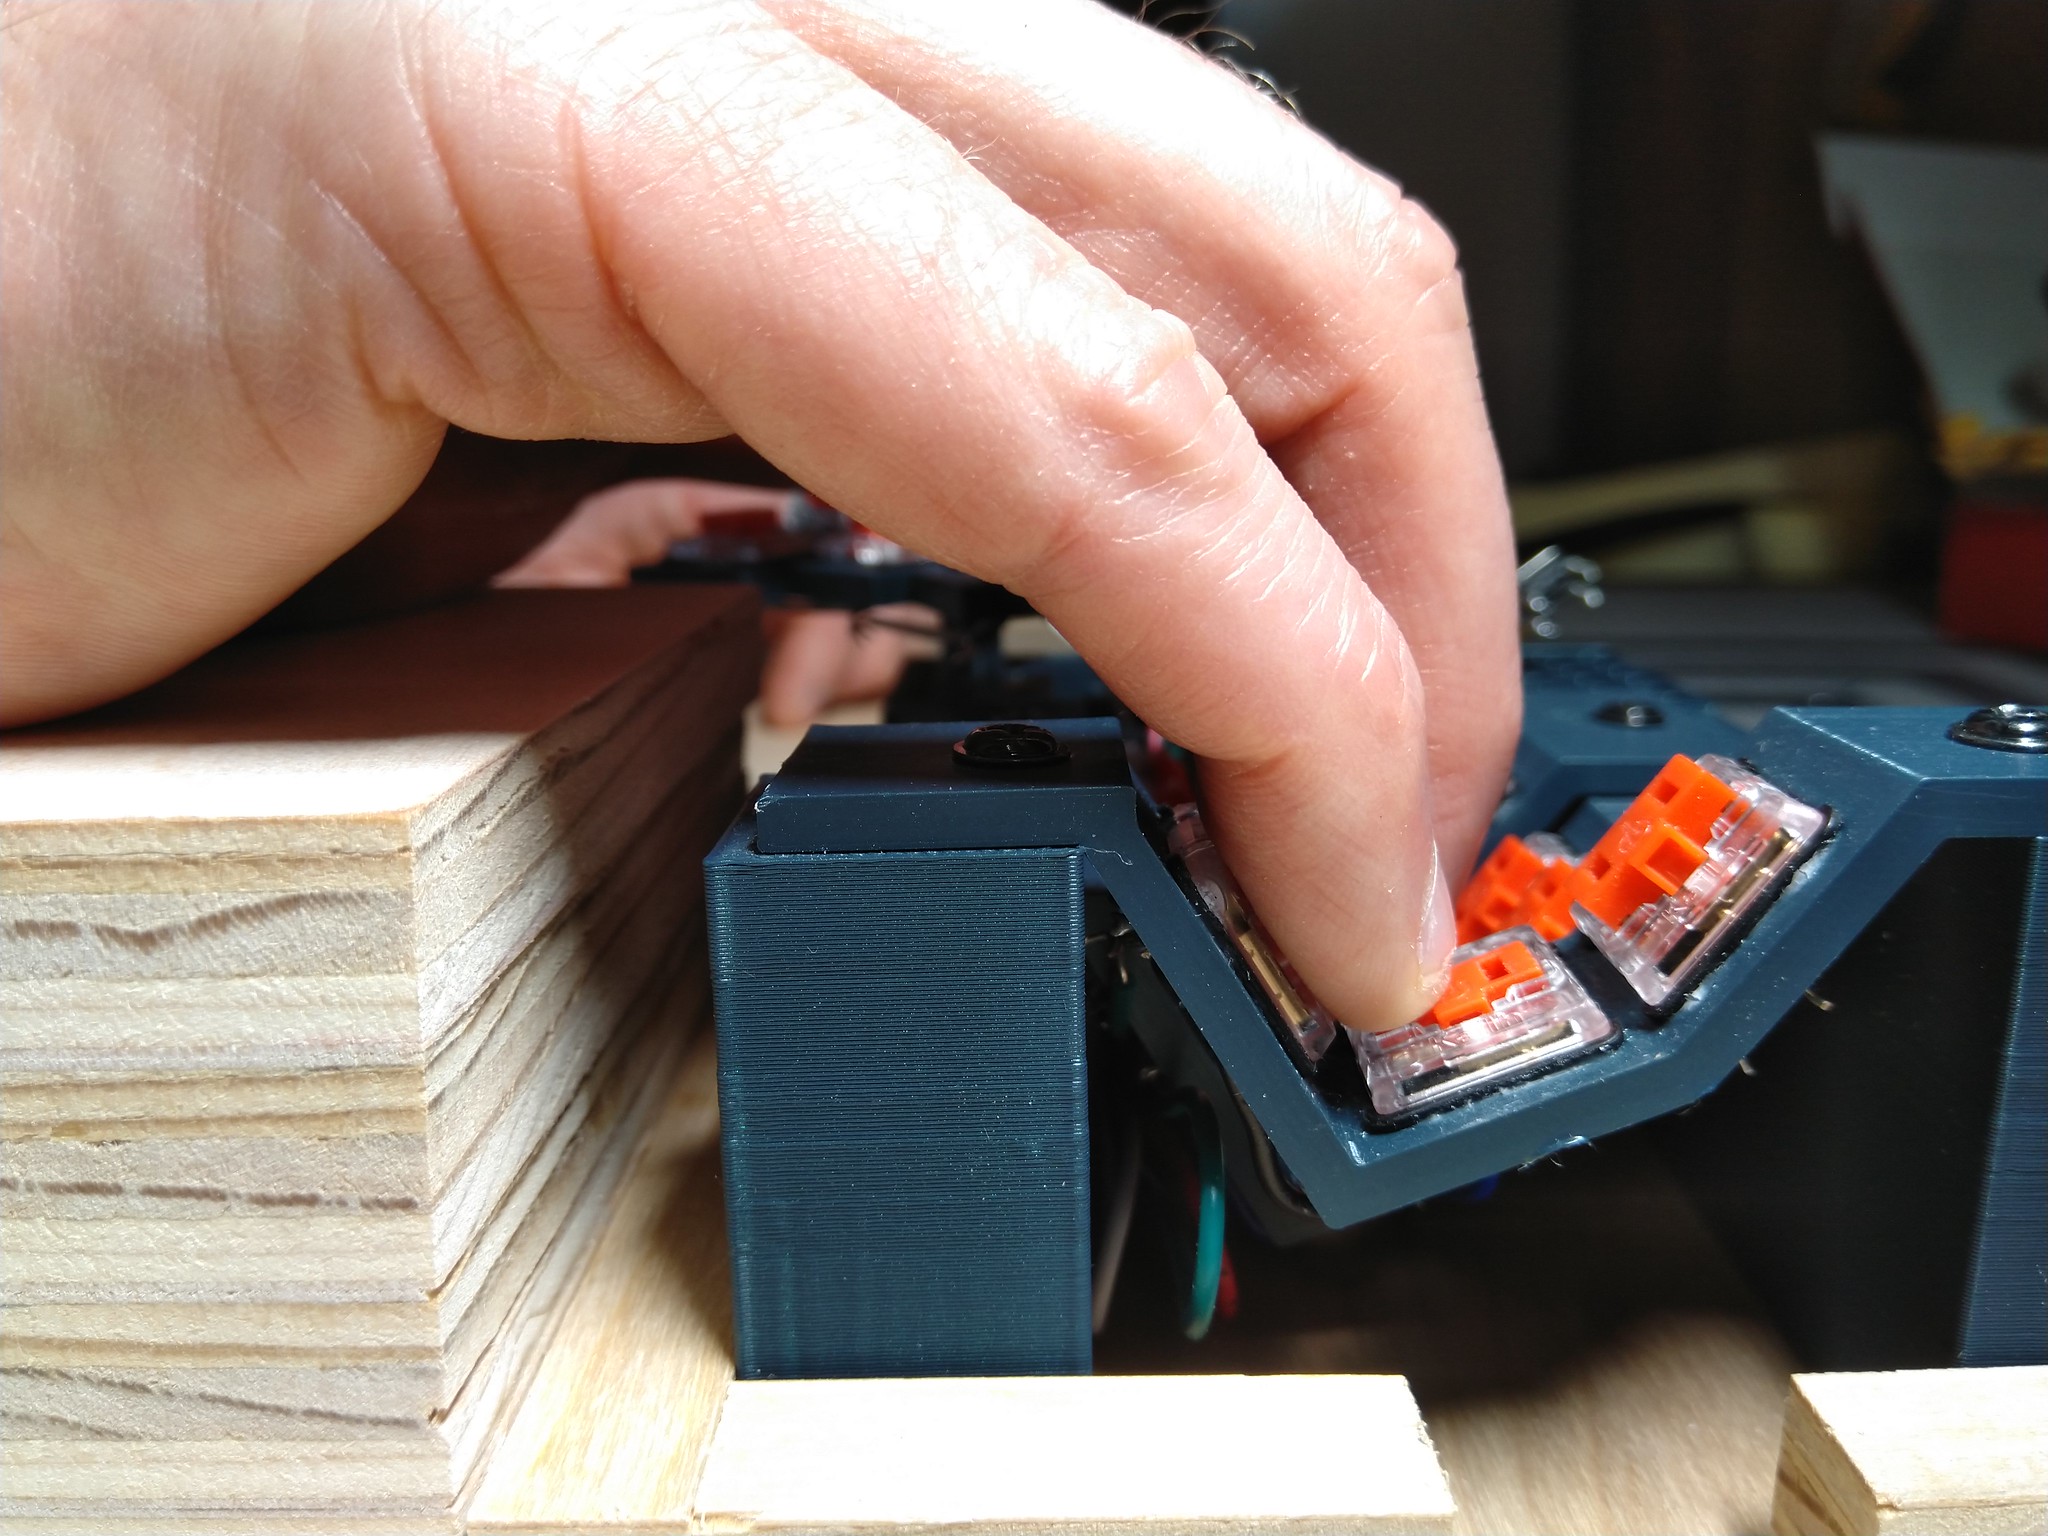
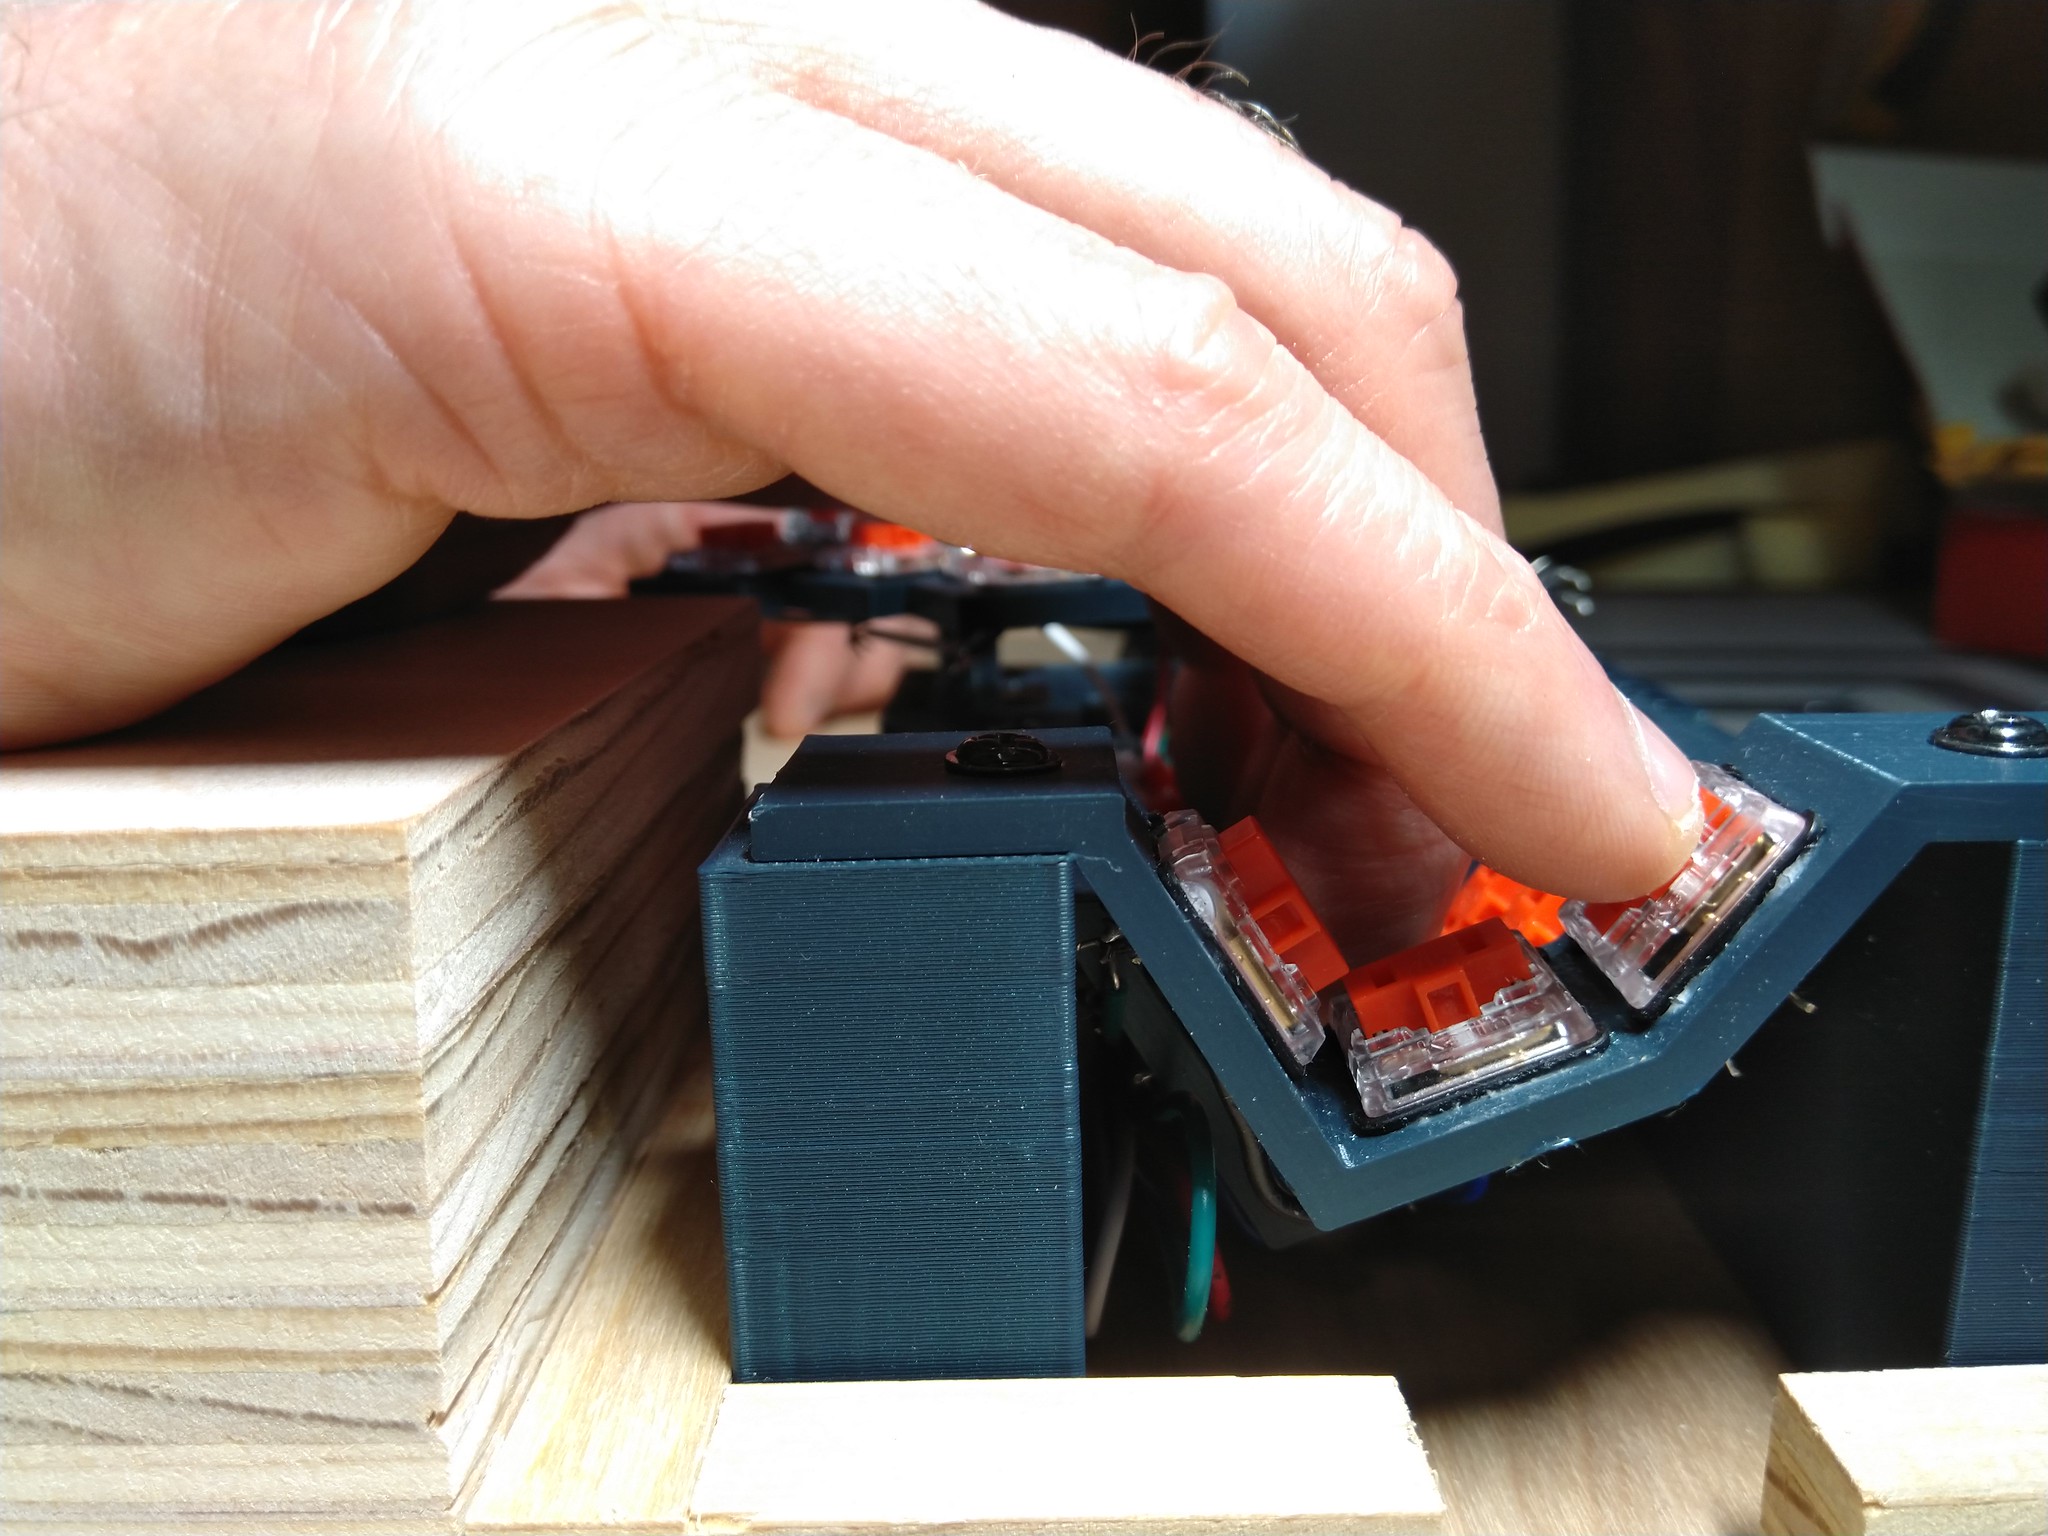
I think the main design element that sets this apart for other similar keebs is the shape of the middle and bottom rows. They are arranged in a steep 100-degree corner and the home position for the finger rests simultaneously with the point of the finger resting on the middle row and the pad of the finger resting on the bottom row. You can type the middle row while maintaining contact with the bottom row, and vice versa. So there's 2 separate keys that can be typed without any reaching.
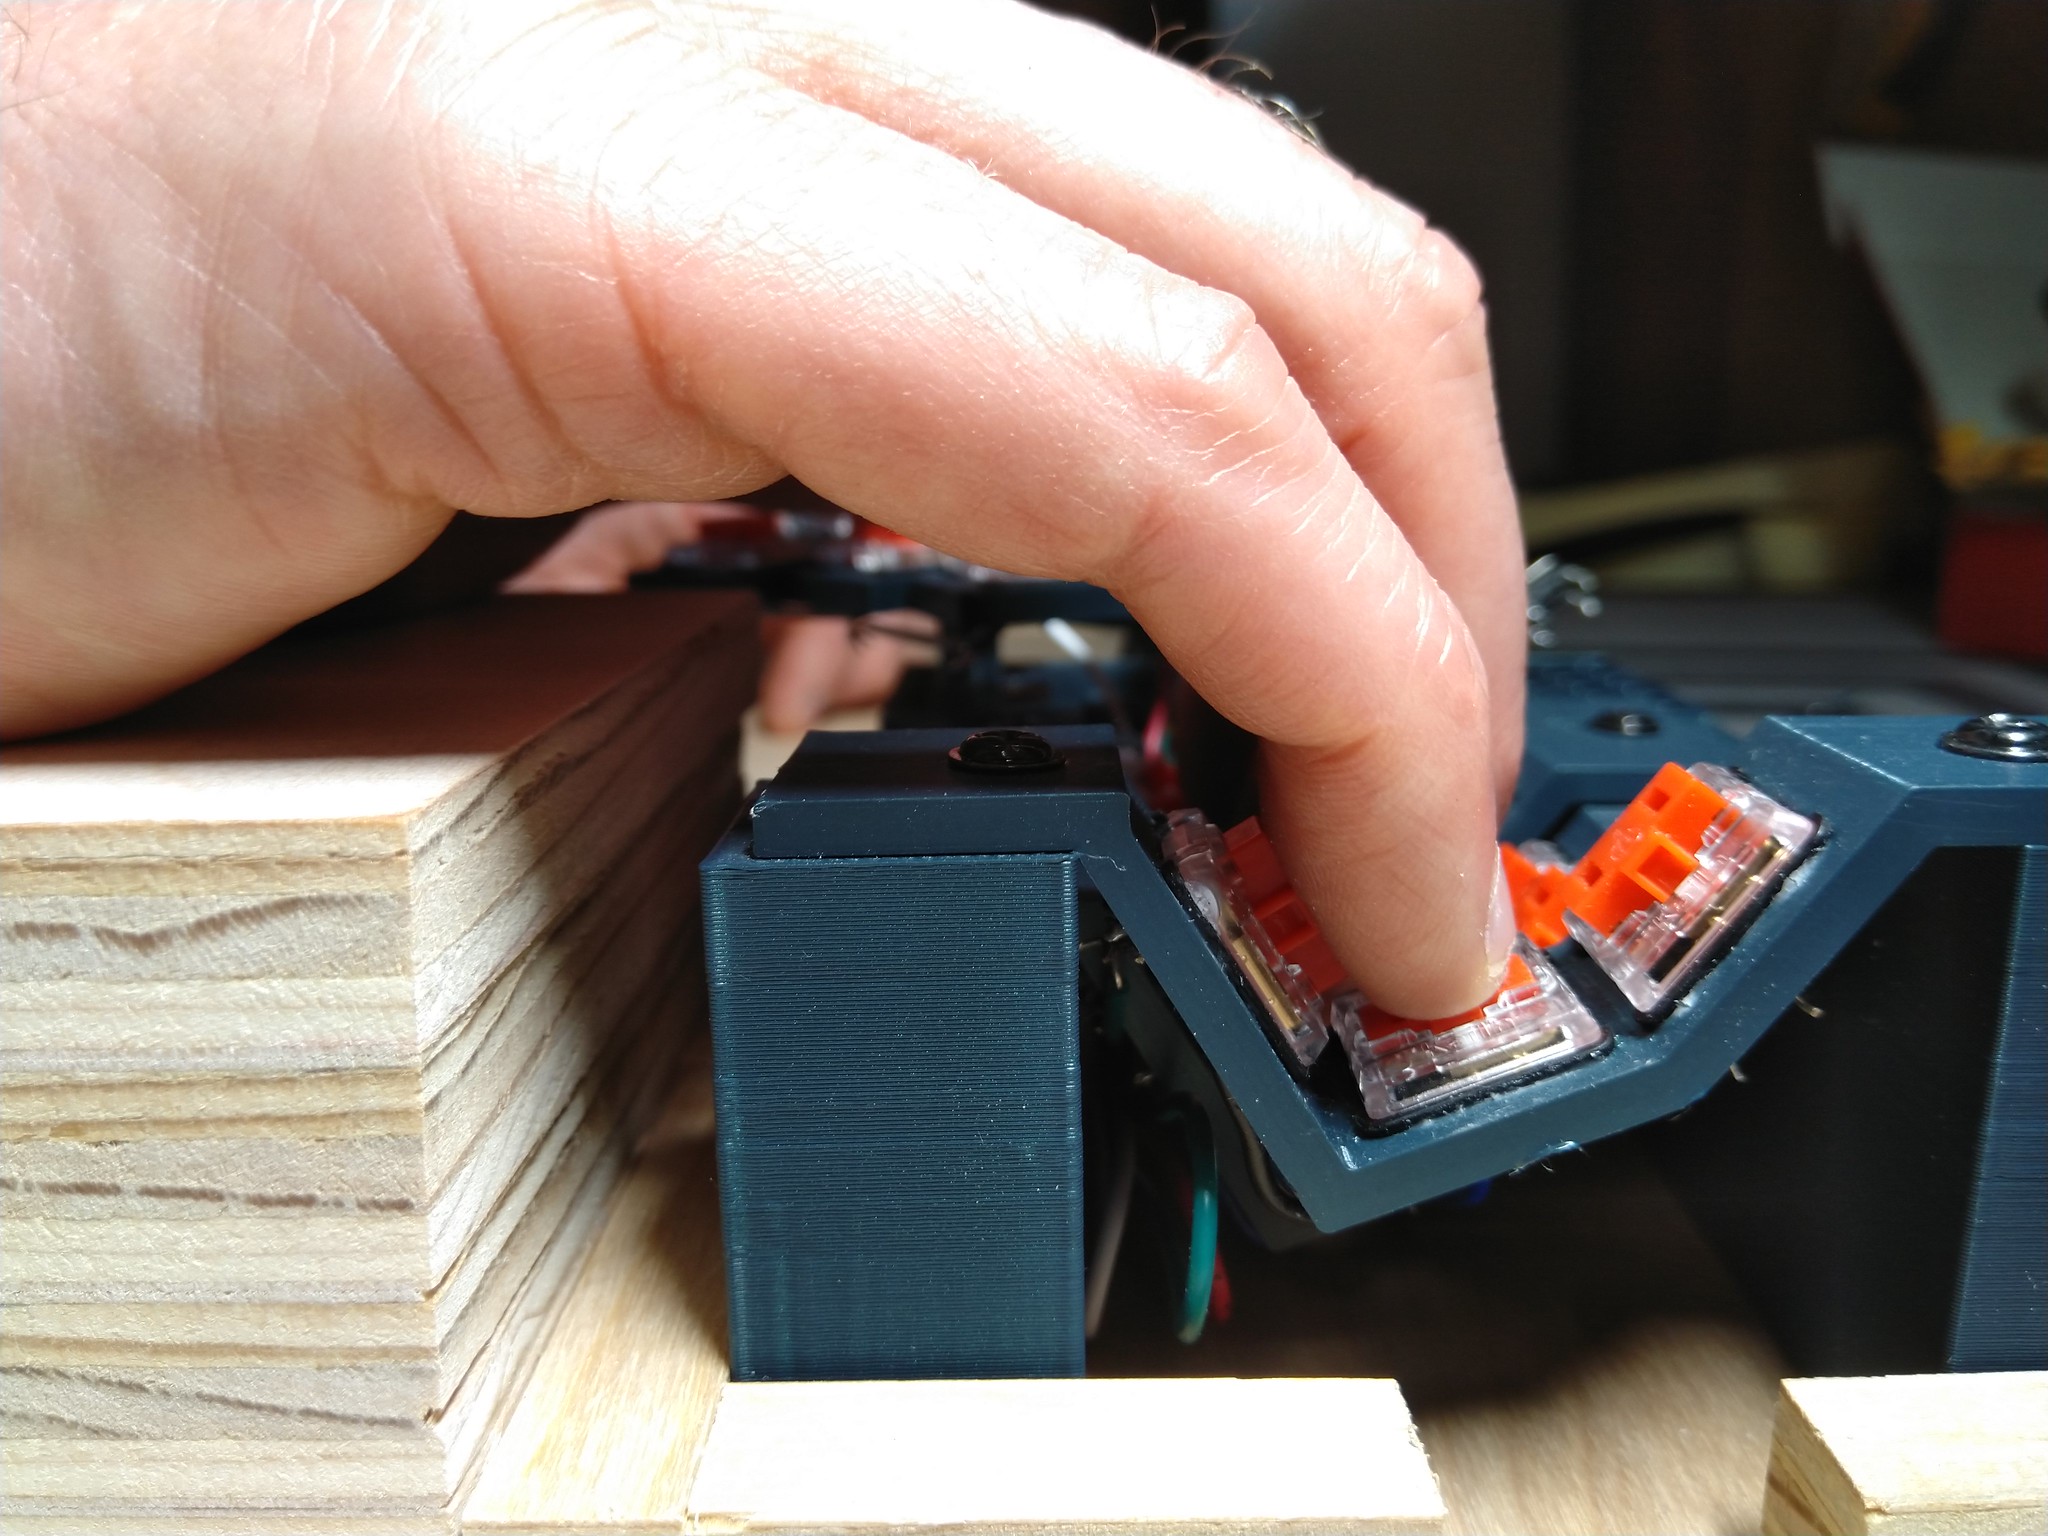
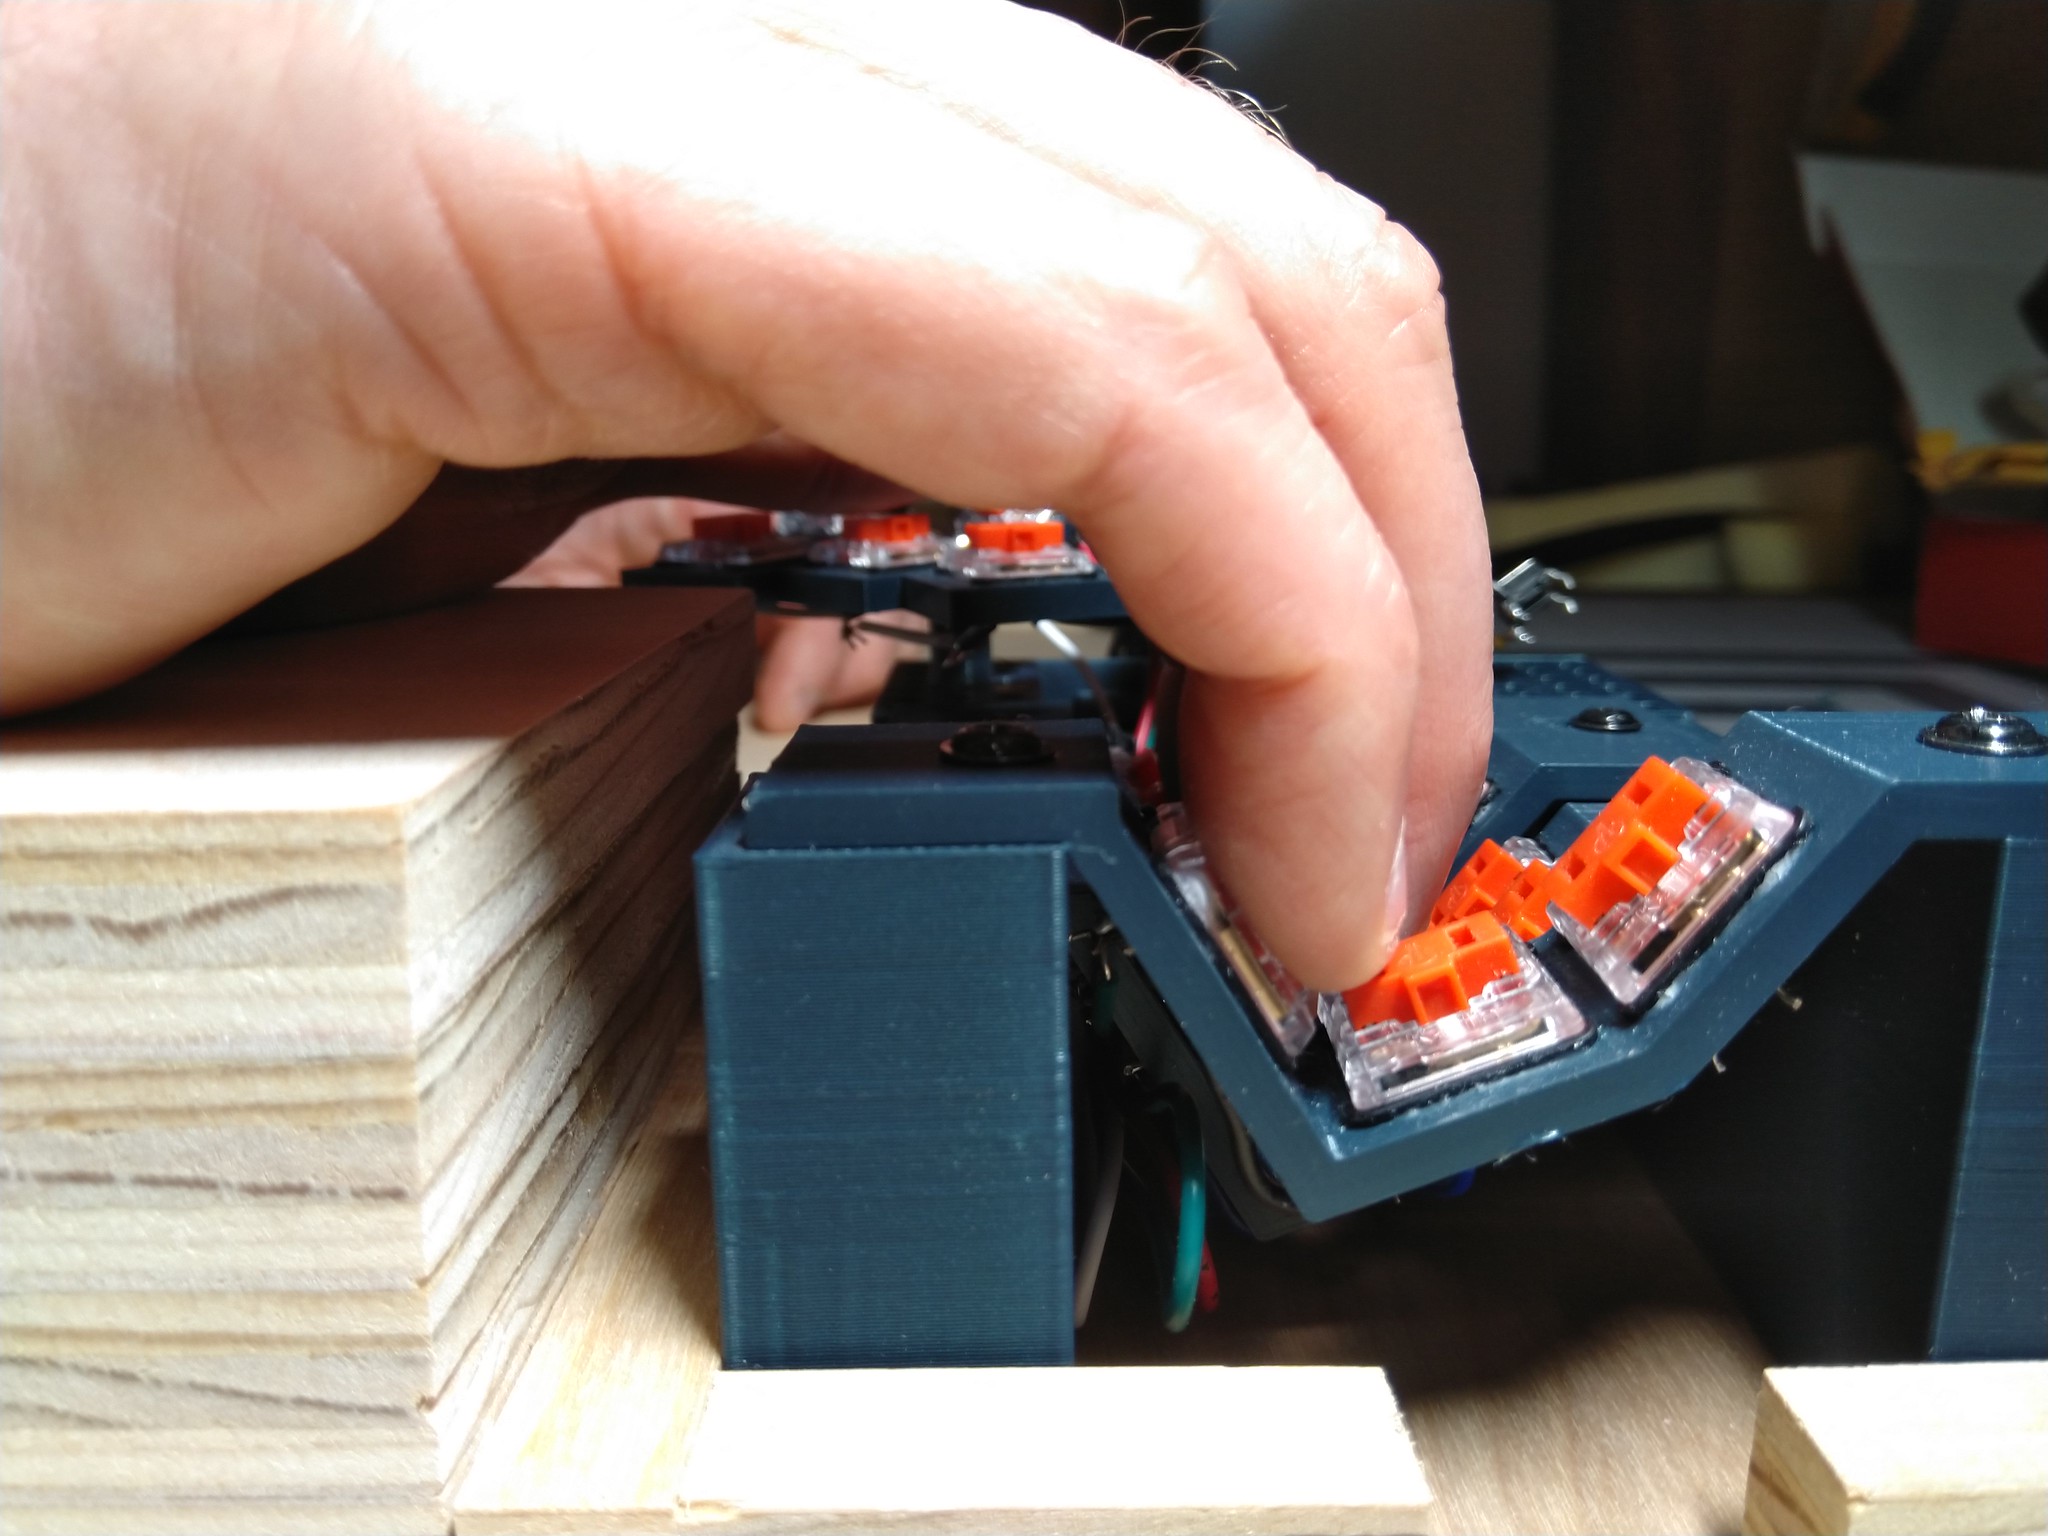
Additionally, because the switches are in such a tight corner, it's possible to press both of them with a single finger by poking into the corner. Both keys press and release in perfect unison. So each finger has 3 separate characters it can type without any reaching when you add a QMK combo into the keymap.
There is an upper row which is positioned and angled for very small reach so when you add that it's 4 keys per finger. The upper row is so tightly spaced that if you reach for it, you'll overshoot it. You don't need to reach. Just "think up" slightly and you hit it.
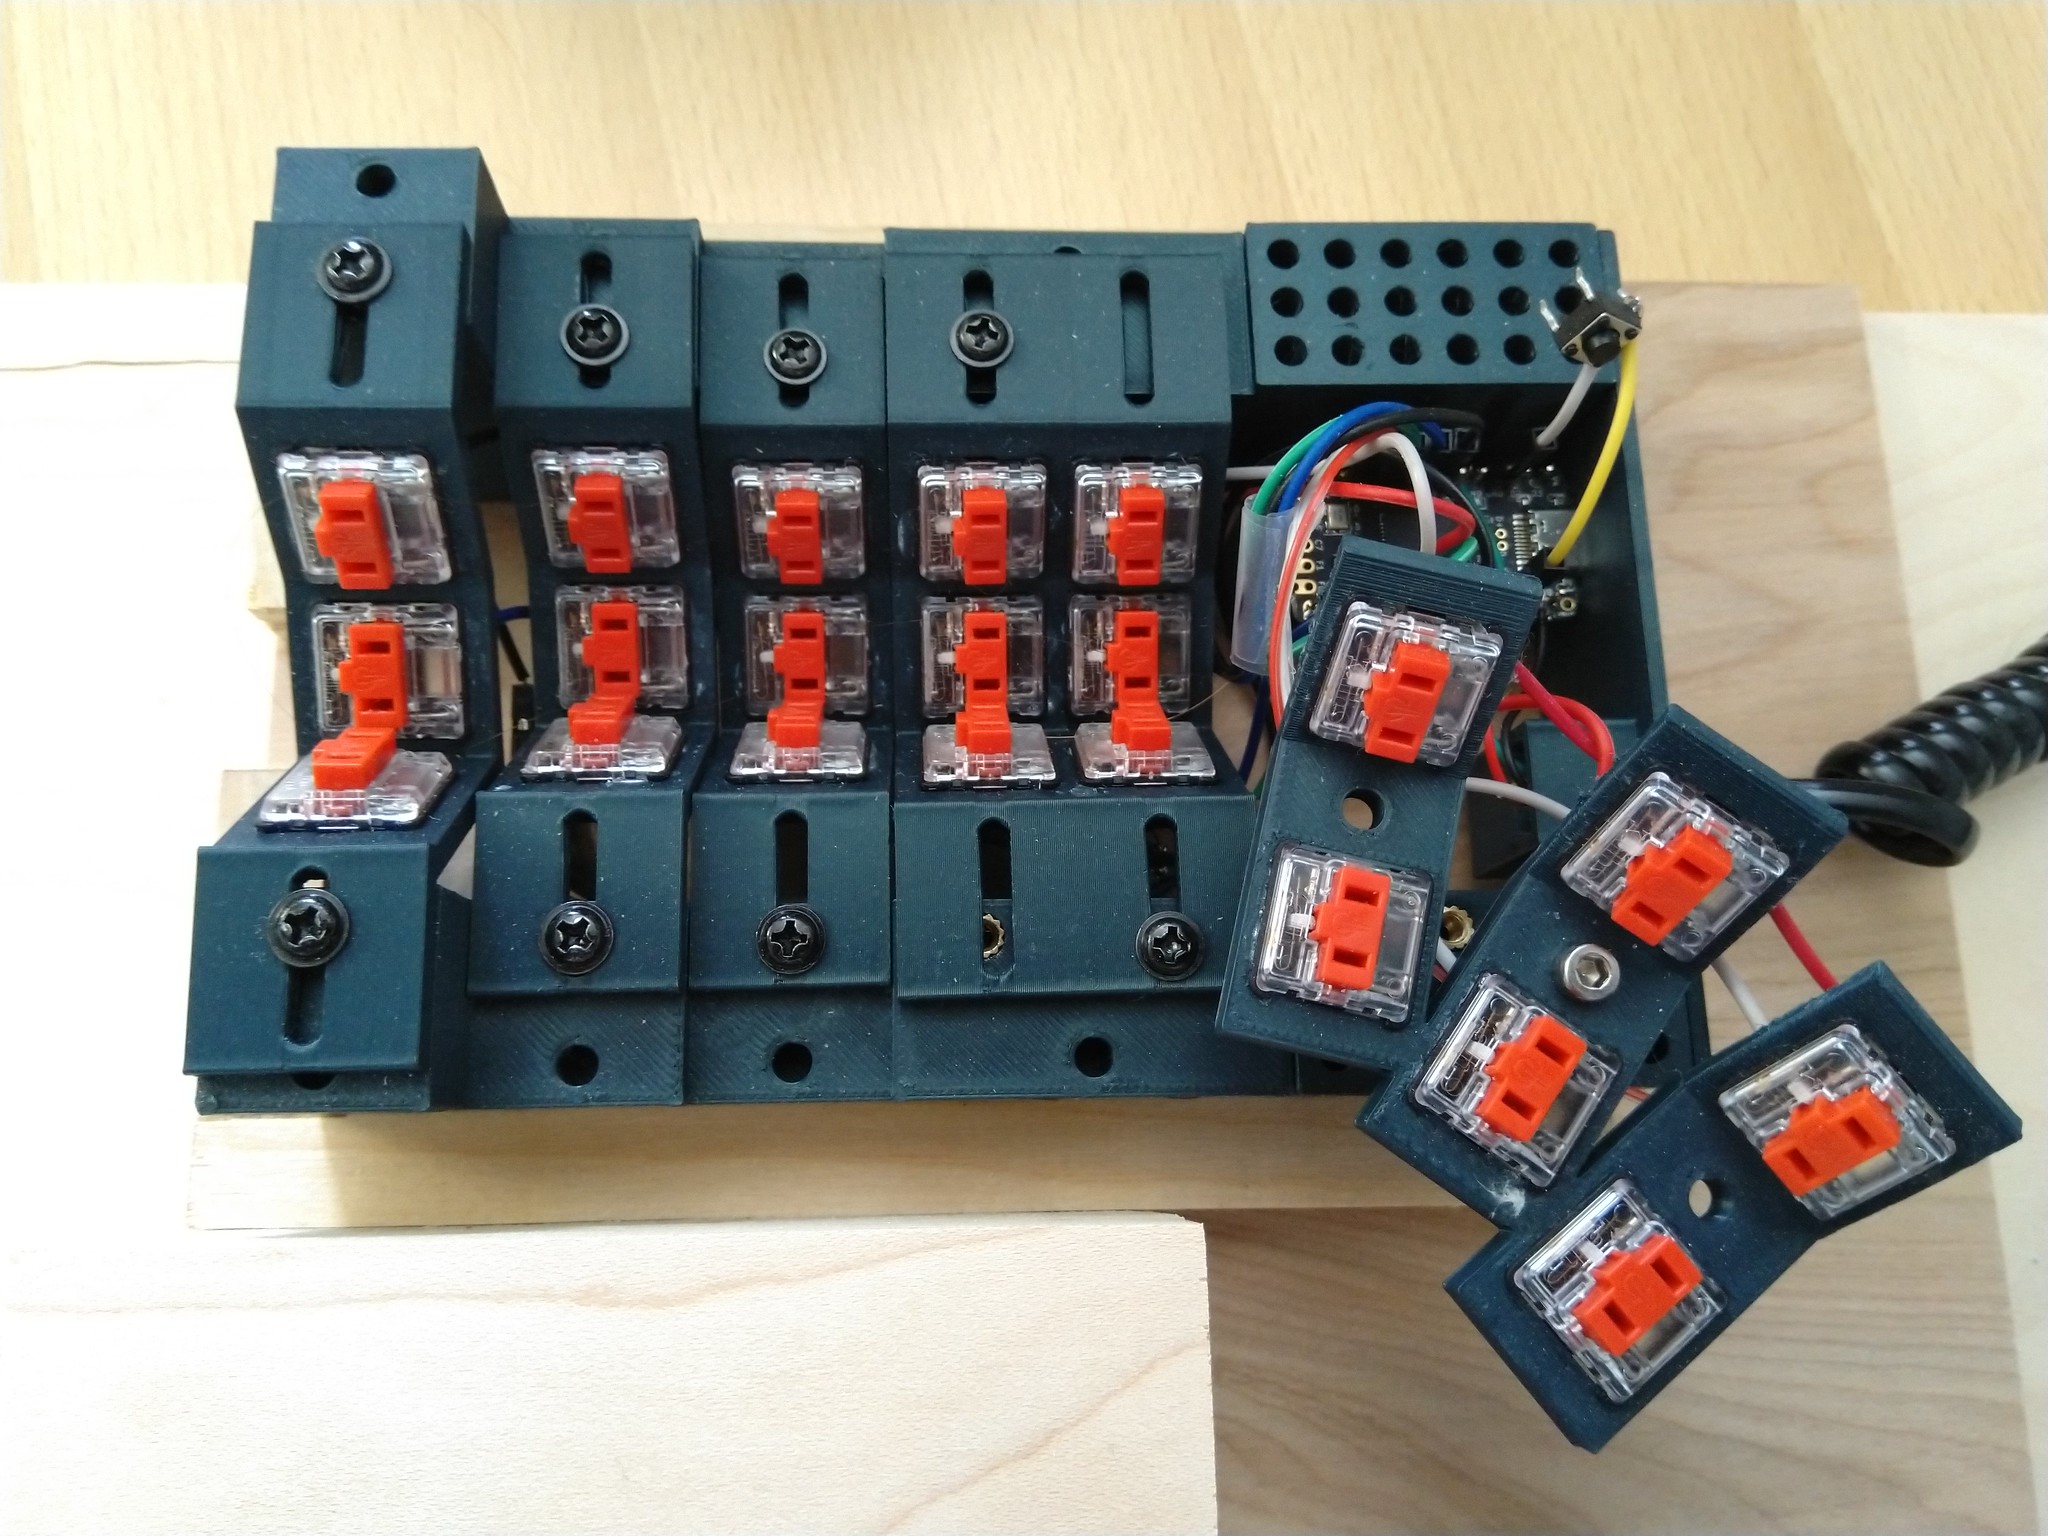
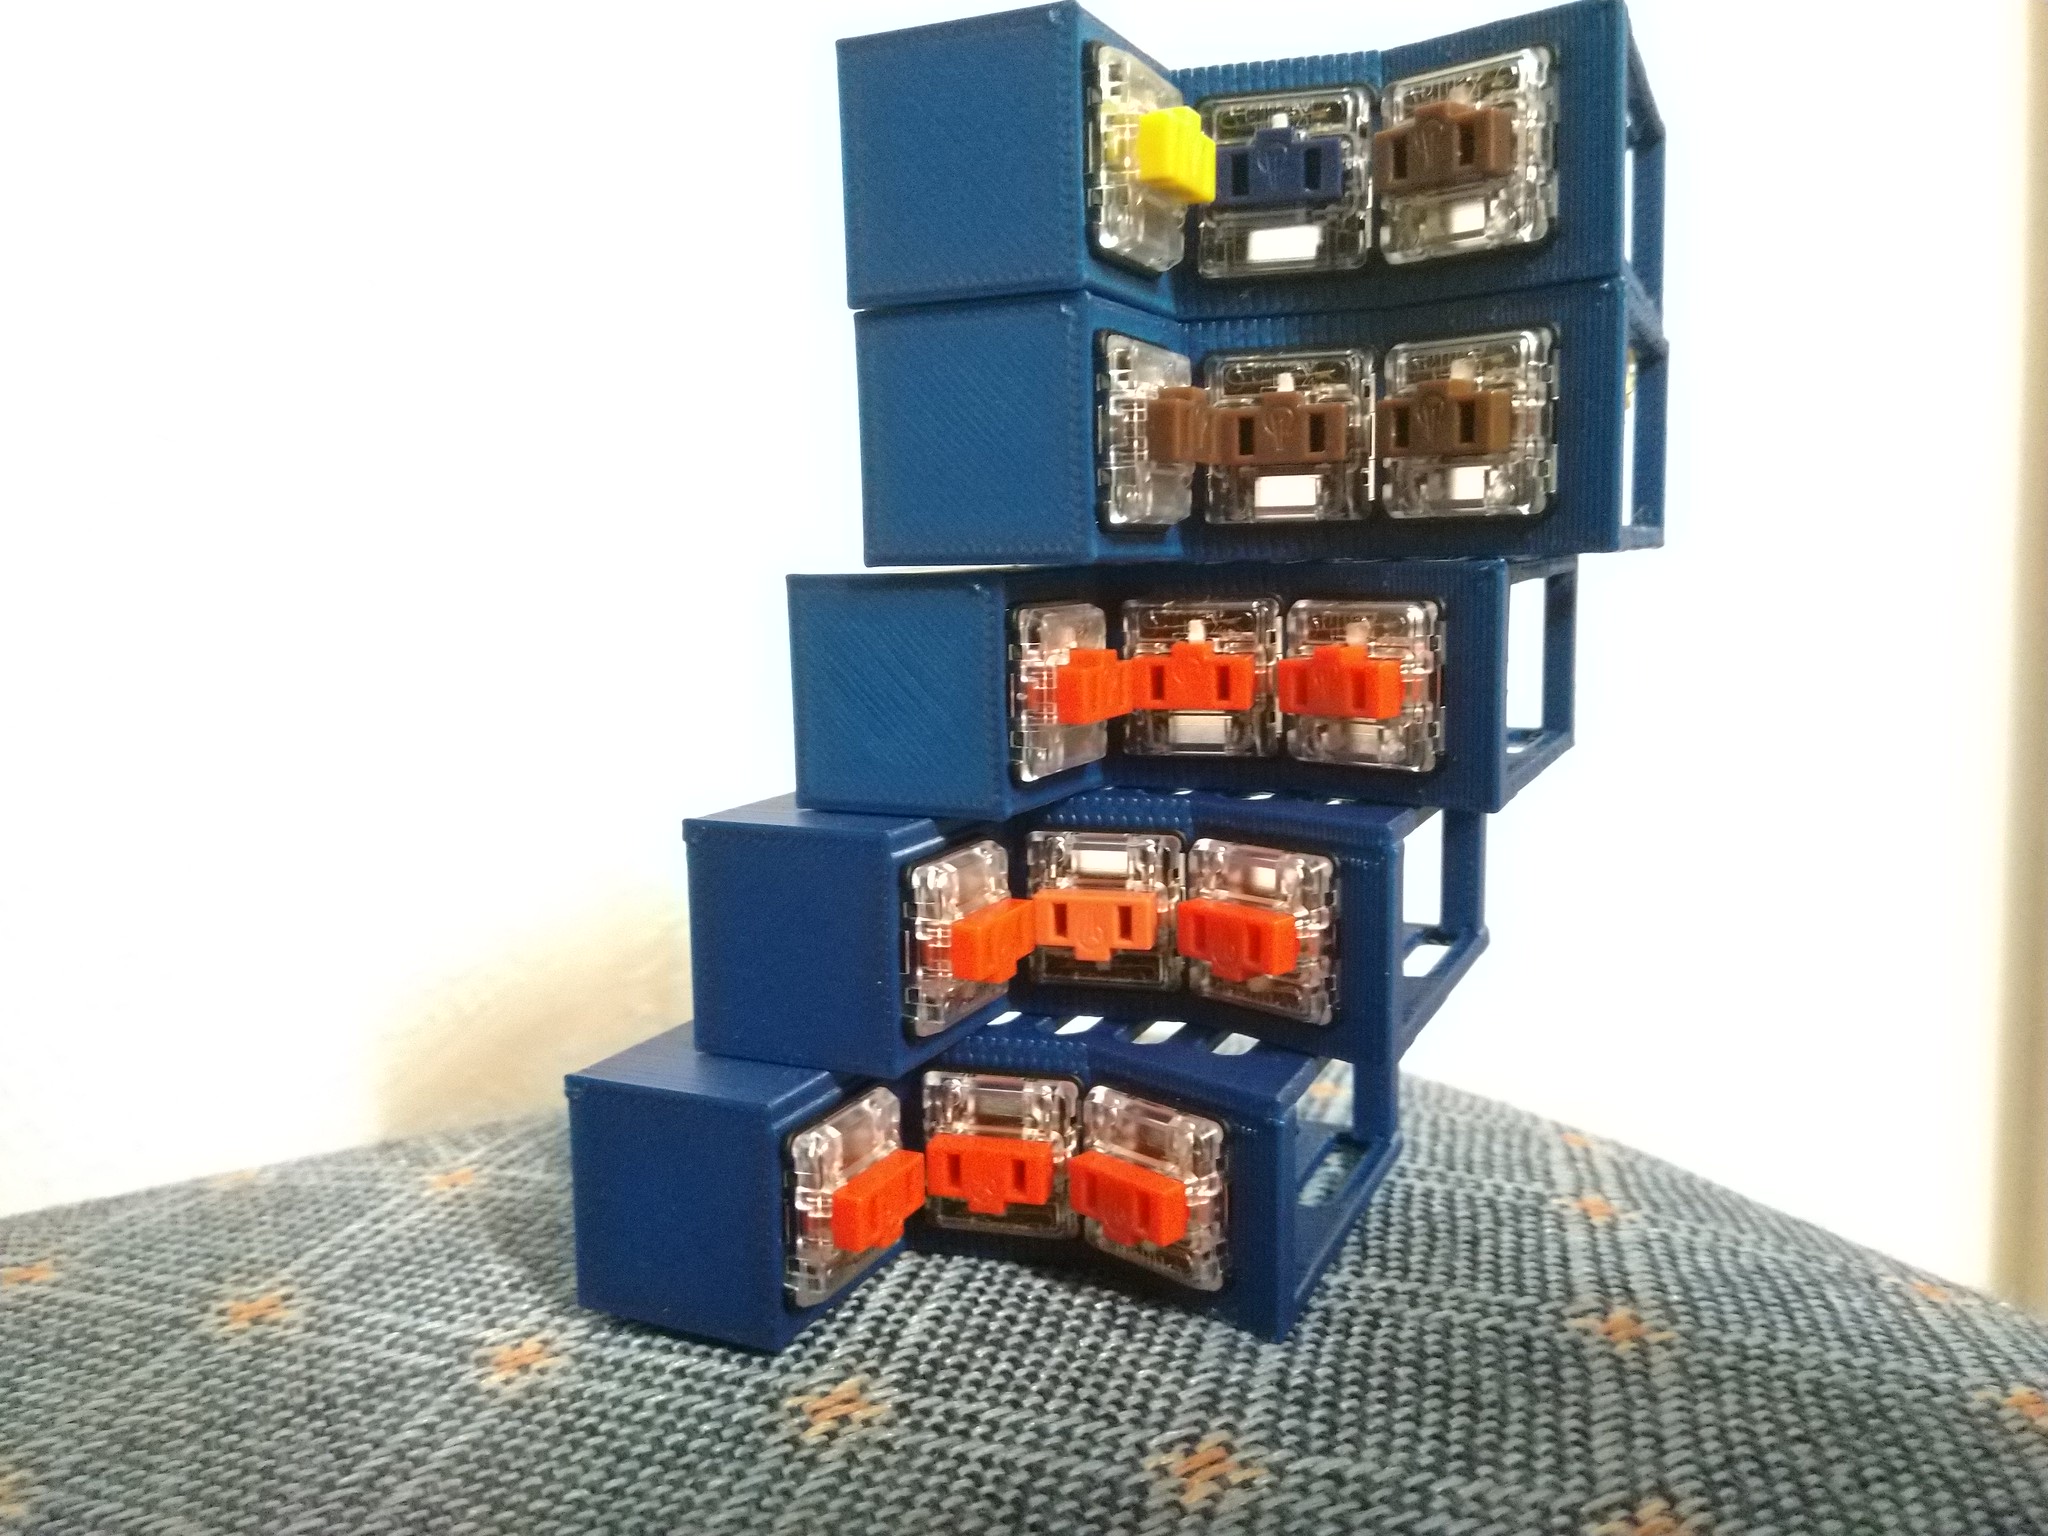
Physical layout of switches
So we have a 3x5 grid for the fingers plus 6 thumb keys so it's 21 keys per hand for a total of 42 (nice!). The thumb cluster has pairs of keys in a "lounge chair" arrangement with one flat and one reclined at an angle making it easy to hit them separately or to chord them. One column is the home position for the thumb and then there's one you move your thumb inward to hit and another you move outward for.
Ergonomics and Custom Tailor Fitting
The row spacing is designed essentially to be as tight as possible given Kailh choc switches. I knew from the outset I wanted much denser switch spacing, and if there were smaller switches available I might even go a tiny bit smaller, but this is probably close to ideal.
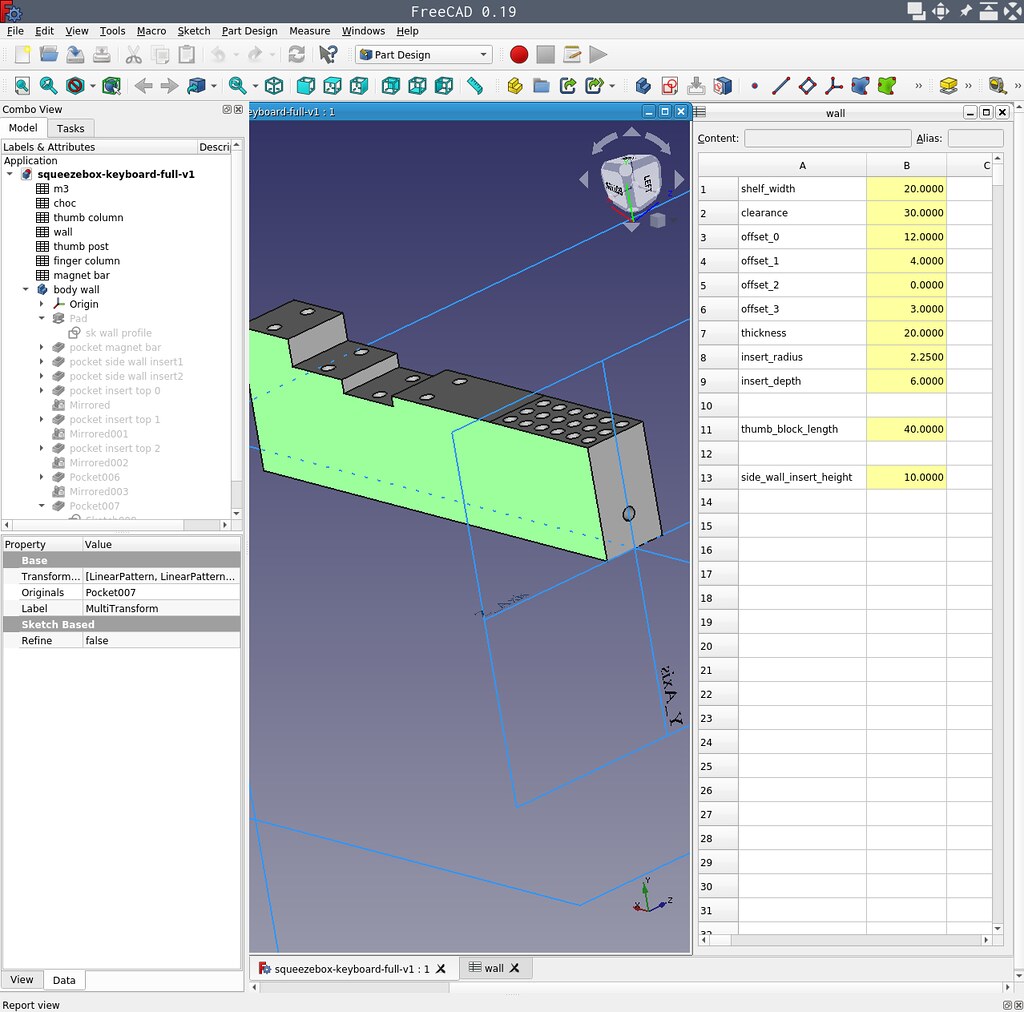
The height of each column is controlled in parameterized CAD for the front/back walls so to adjust that you dial the parameters and print a new wall. Each column has a custom shelf height supporting it, essentially.
For near/far adjustment, each finger column is on slots that provide about 15mm of movement for each finger independently. Tweak the positions with the bolts slightly loose until it fits perfectly then tighten the bolts and you're set.
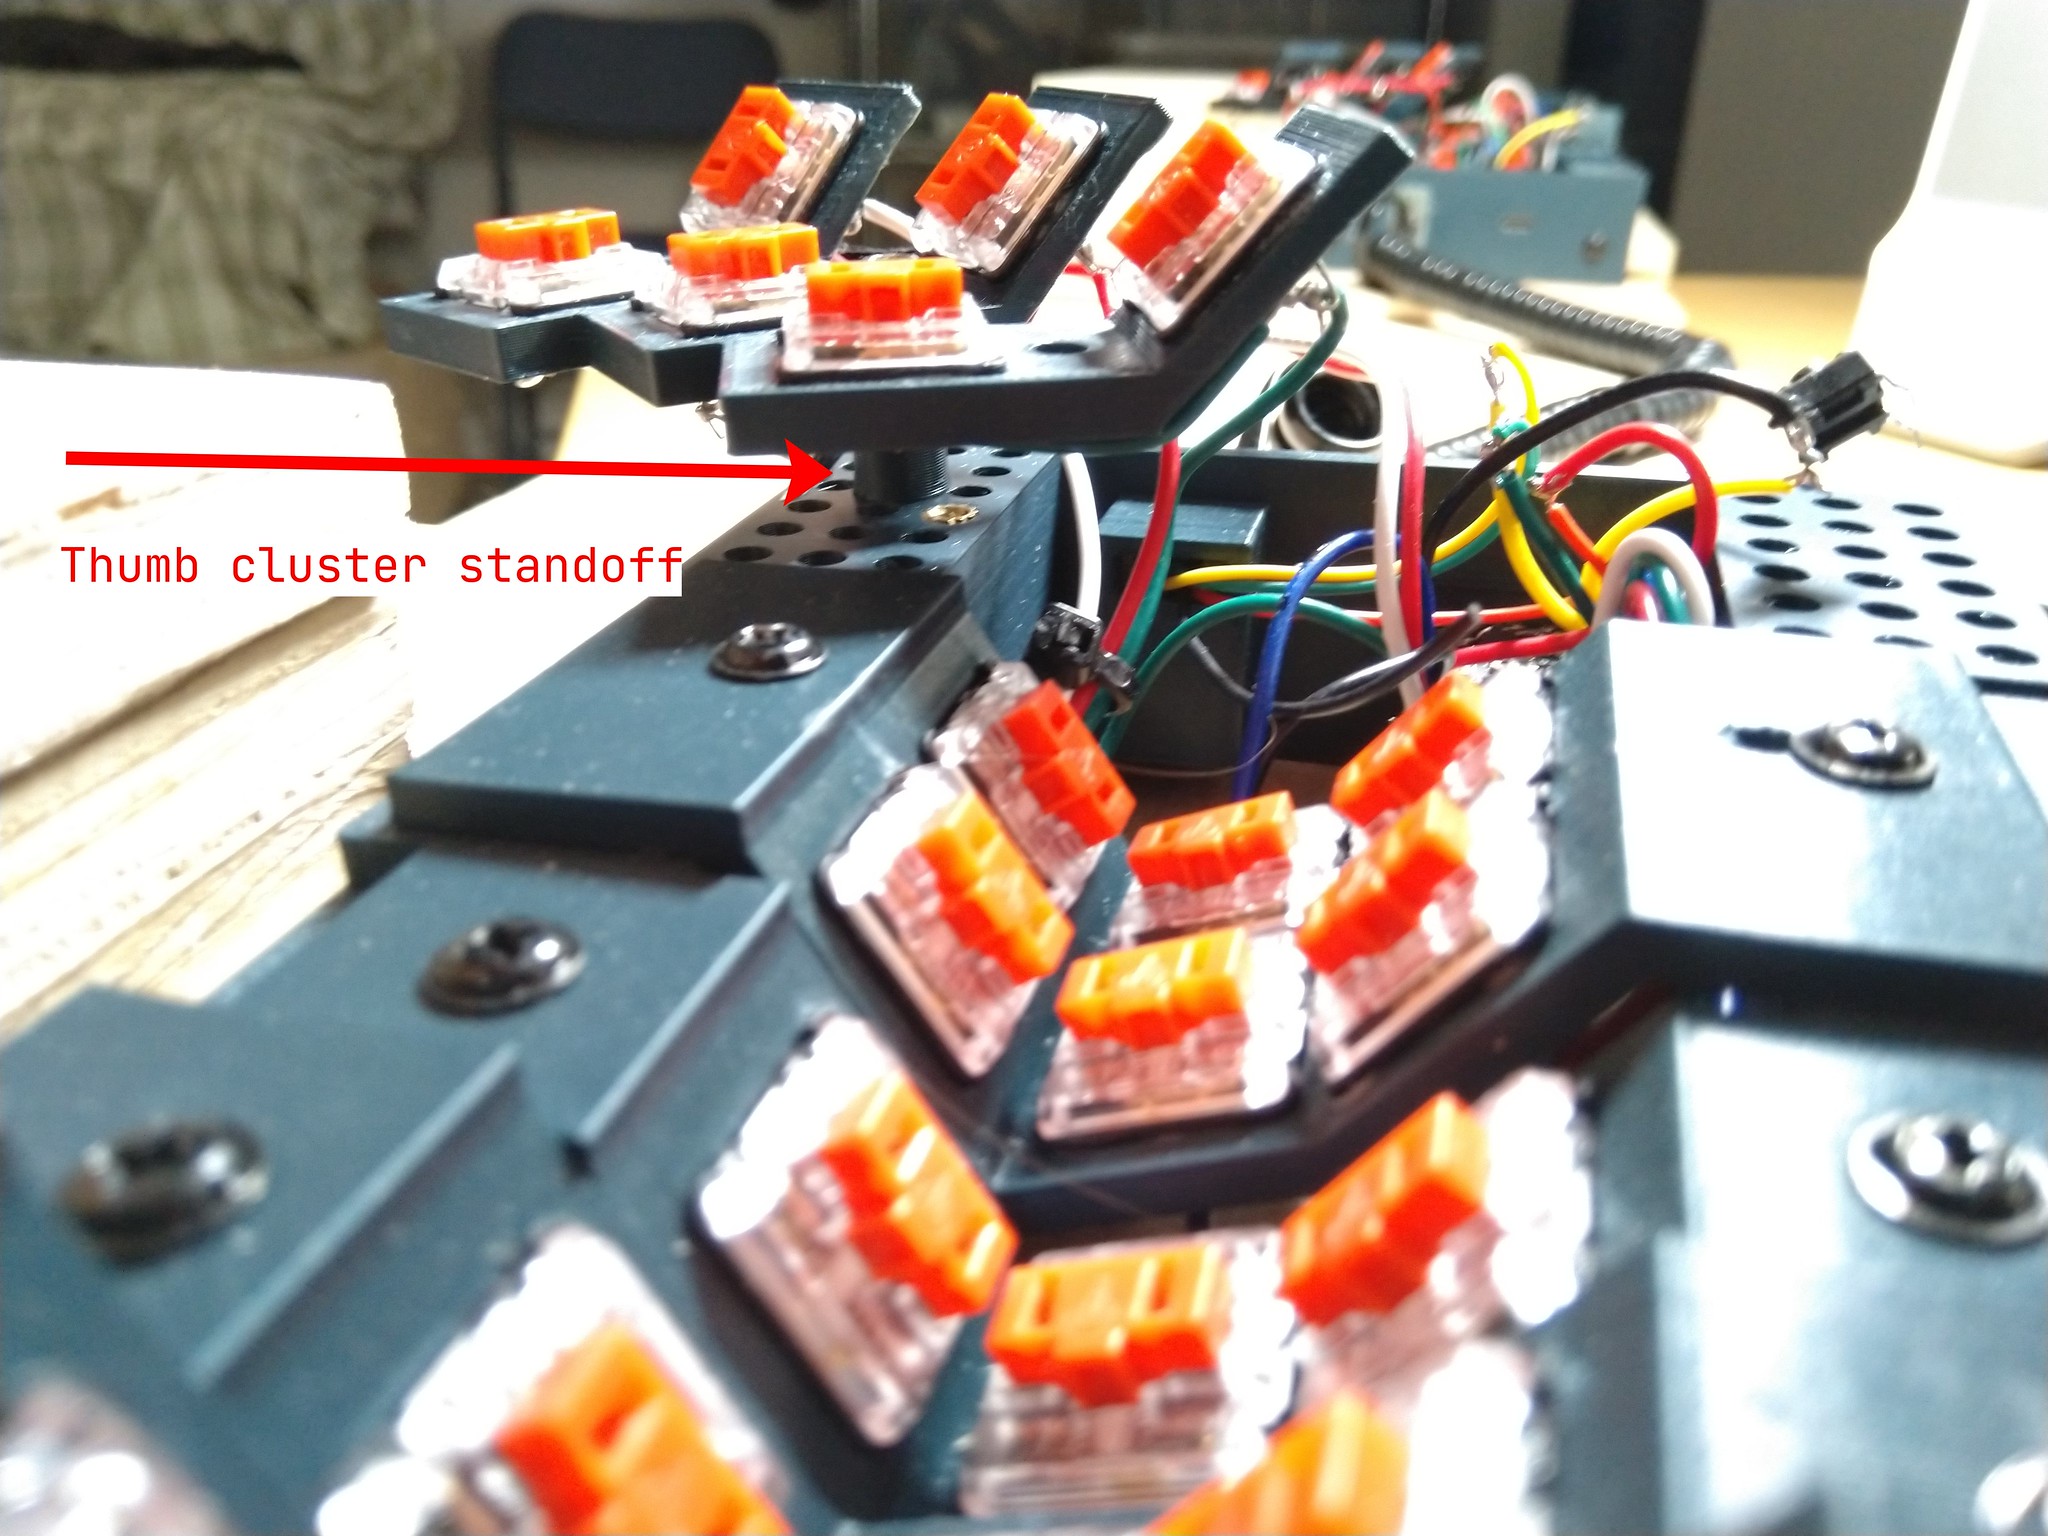
The thumb cluster can be raised/lowered by printing different length standoff cylinder. It's placement left/right and near/far is adjusted by way of the grid of threaded insert holes. I've only tried 2 positions so far so I only bothered installing the threaded inserts in 2 of the holes, but in theory each of those little circular holes below the thumb cluster could house a threaded insert.
The thumb cluster will also rotate around the axis of the bolt attaching it to the main case.
My goal at the outset was to make this a kit that most folks could use and tailor to their hand. Probably with some kind of LEGO style brick stack for the column heights that could be achieved. But at the moment adjusting the column heights requires a custom printed part. Everything else is mechanically adjustable, at least within the limits of slack in the wiring.
Naked Switches
No keycaps! Choc switches have a perfectly fine flat-top stem. The tight geometry I wanted requires an extremely small gap between the middle and bottom row switches and keycaps would get in the way. When you look at it from the side you'll notice the bottom row stem actually overlaps just above the middle row stem slightly. Keycaps could technically go on the top row and most of the thumb cluster but they don't really add much and I think it's kind of a hipster flex to not have them. It's like the fixie bike of the keeb world. The switches are installed rotated 90 degrees from standard to reduce the typing gap within a single finger's column.
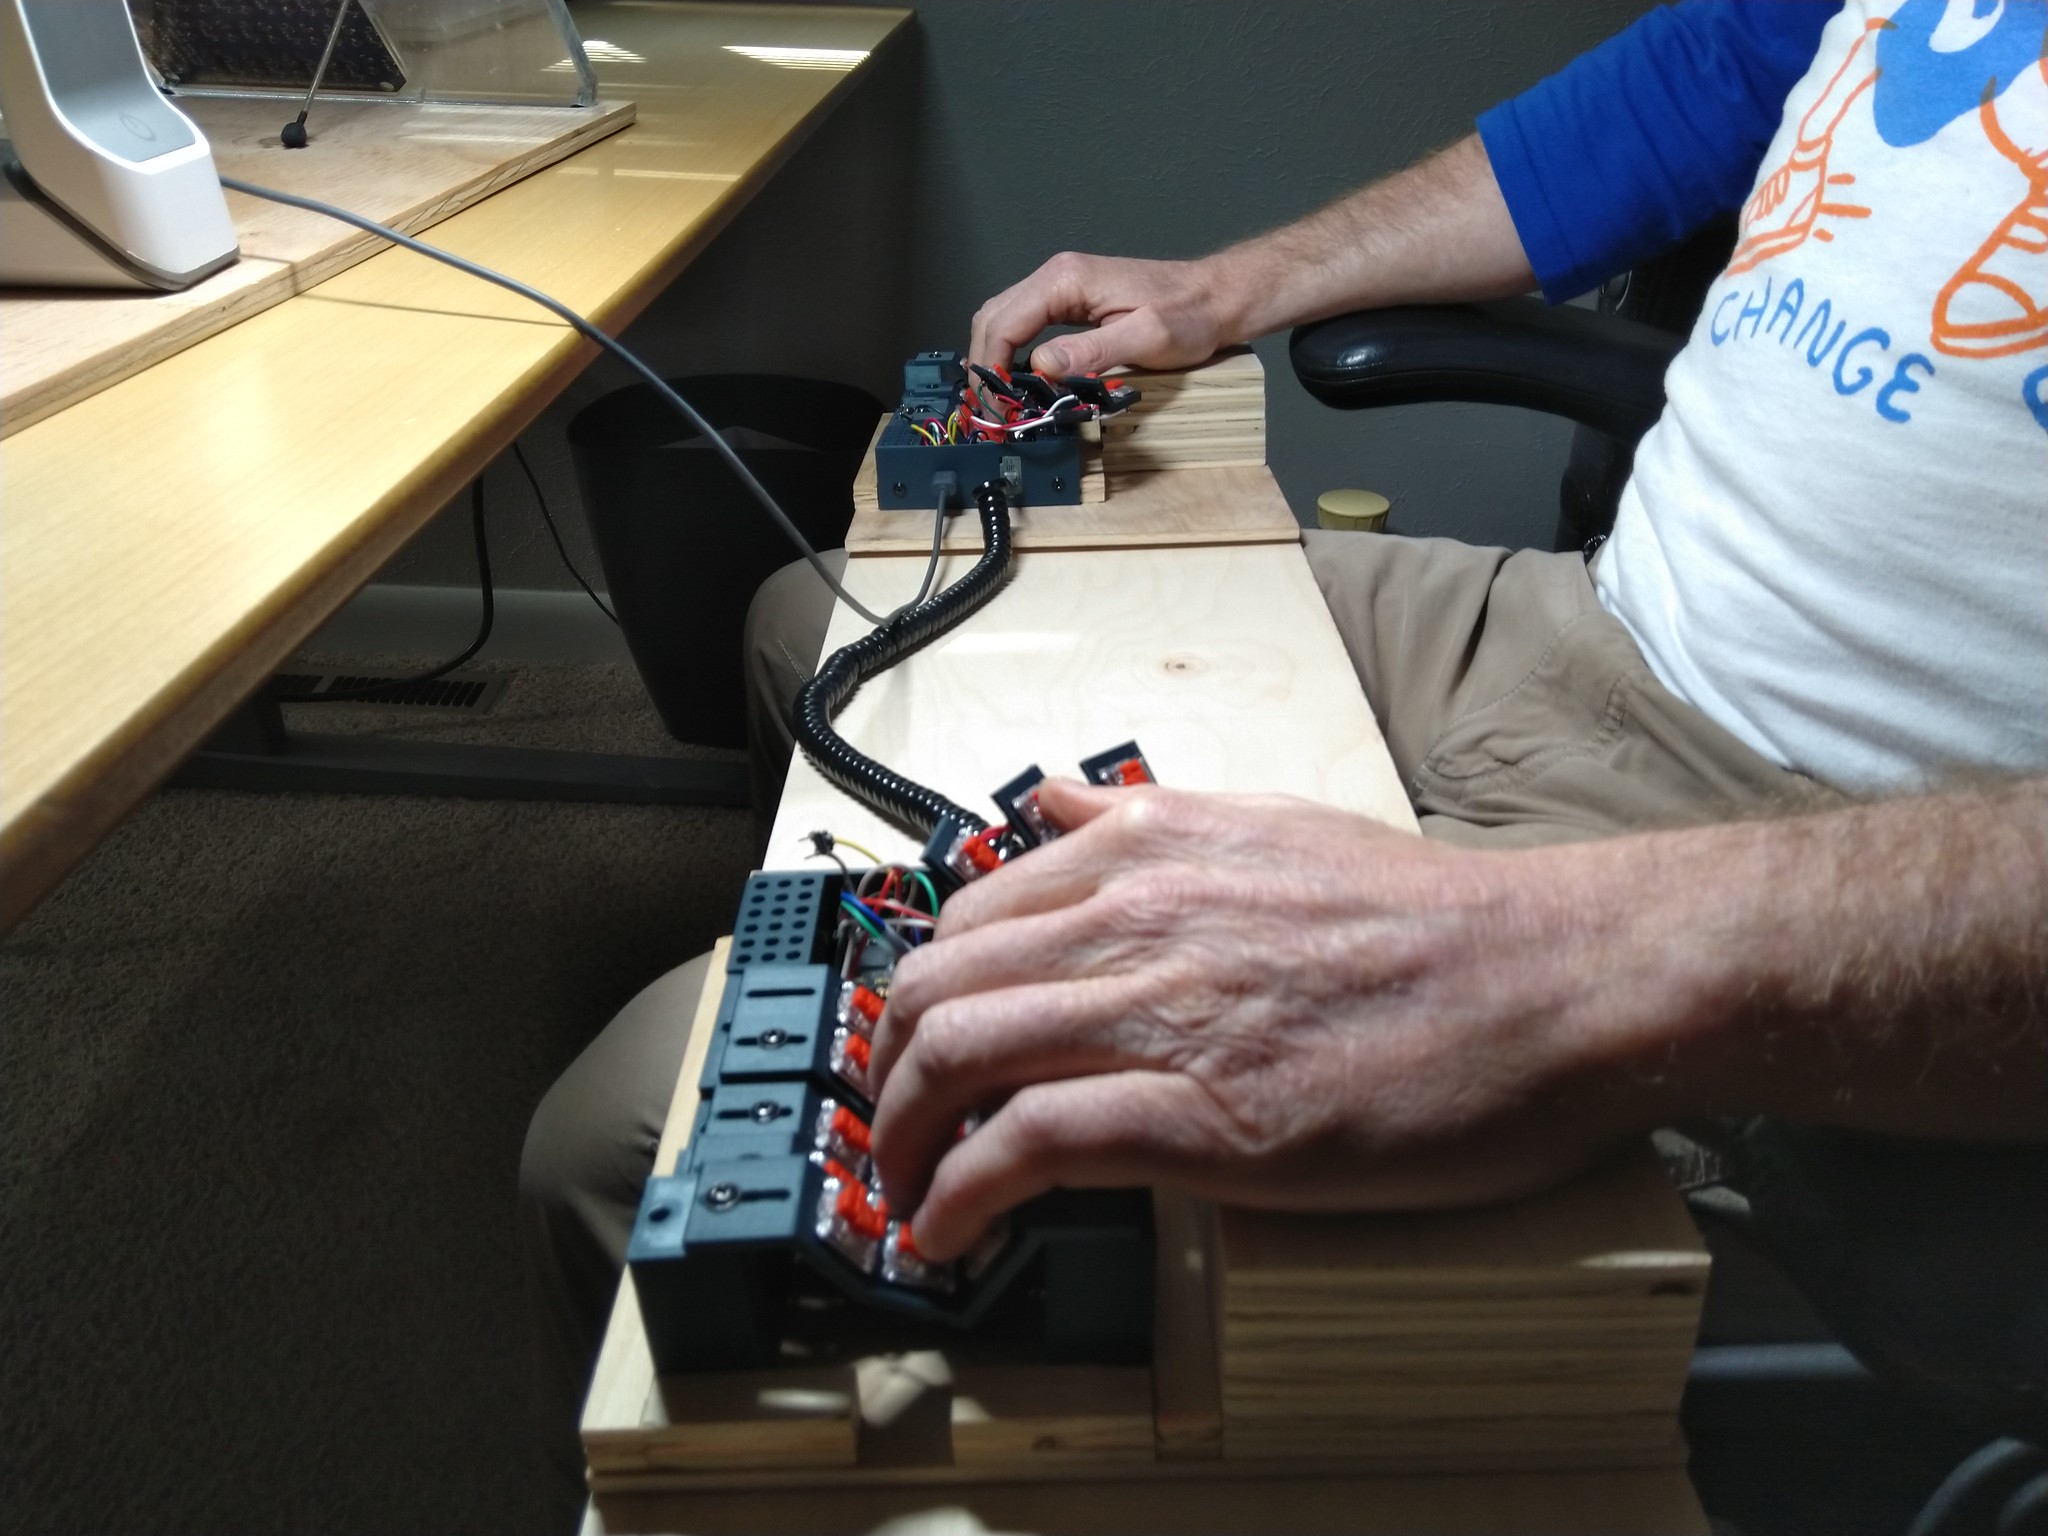
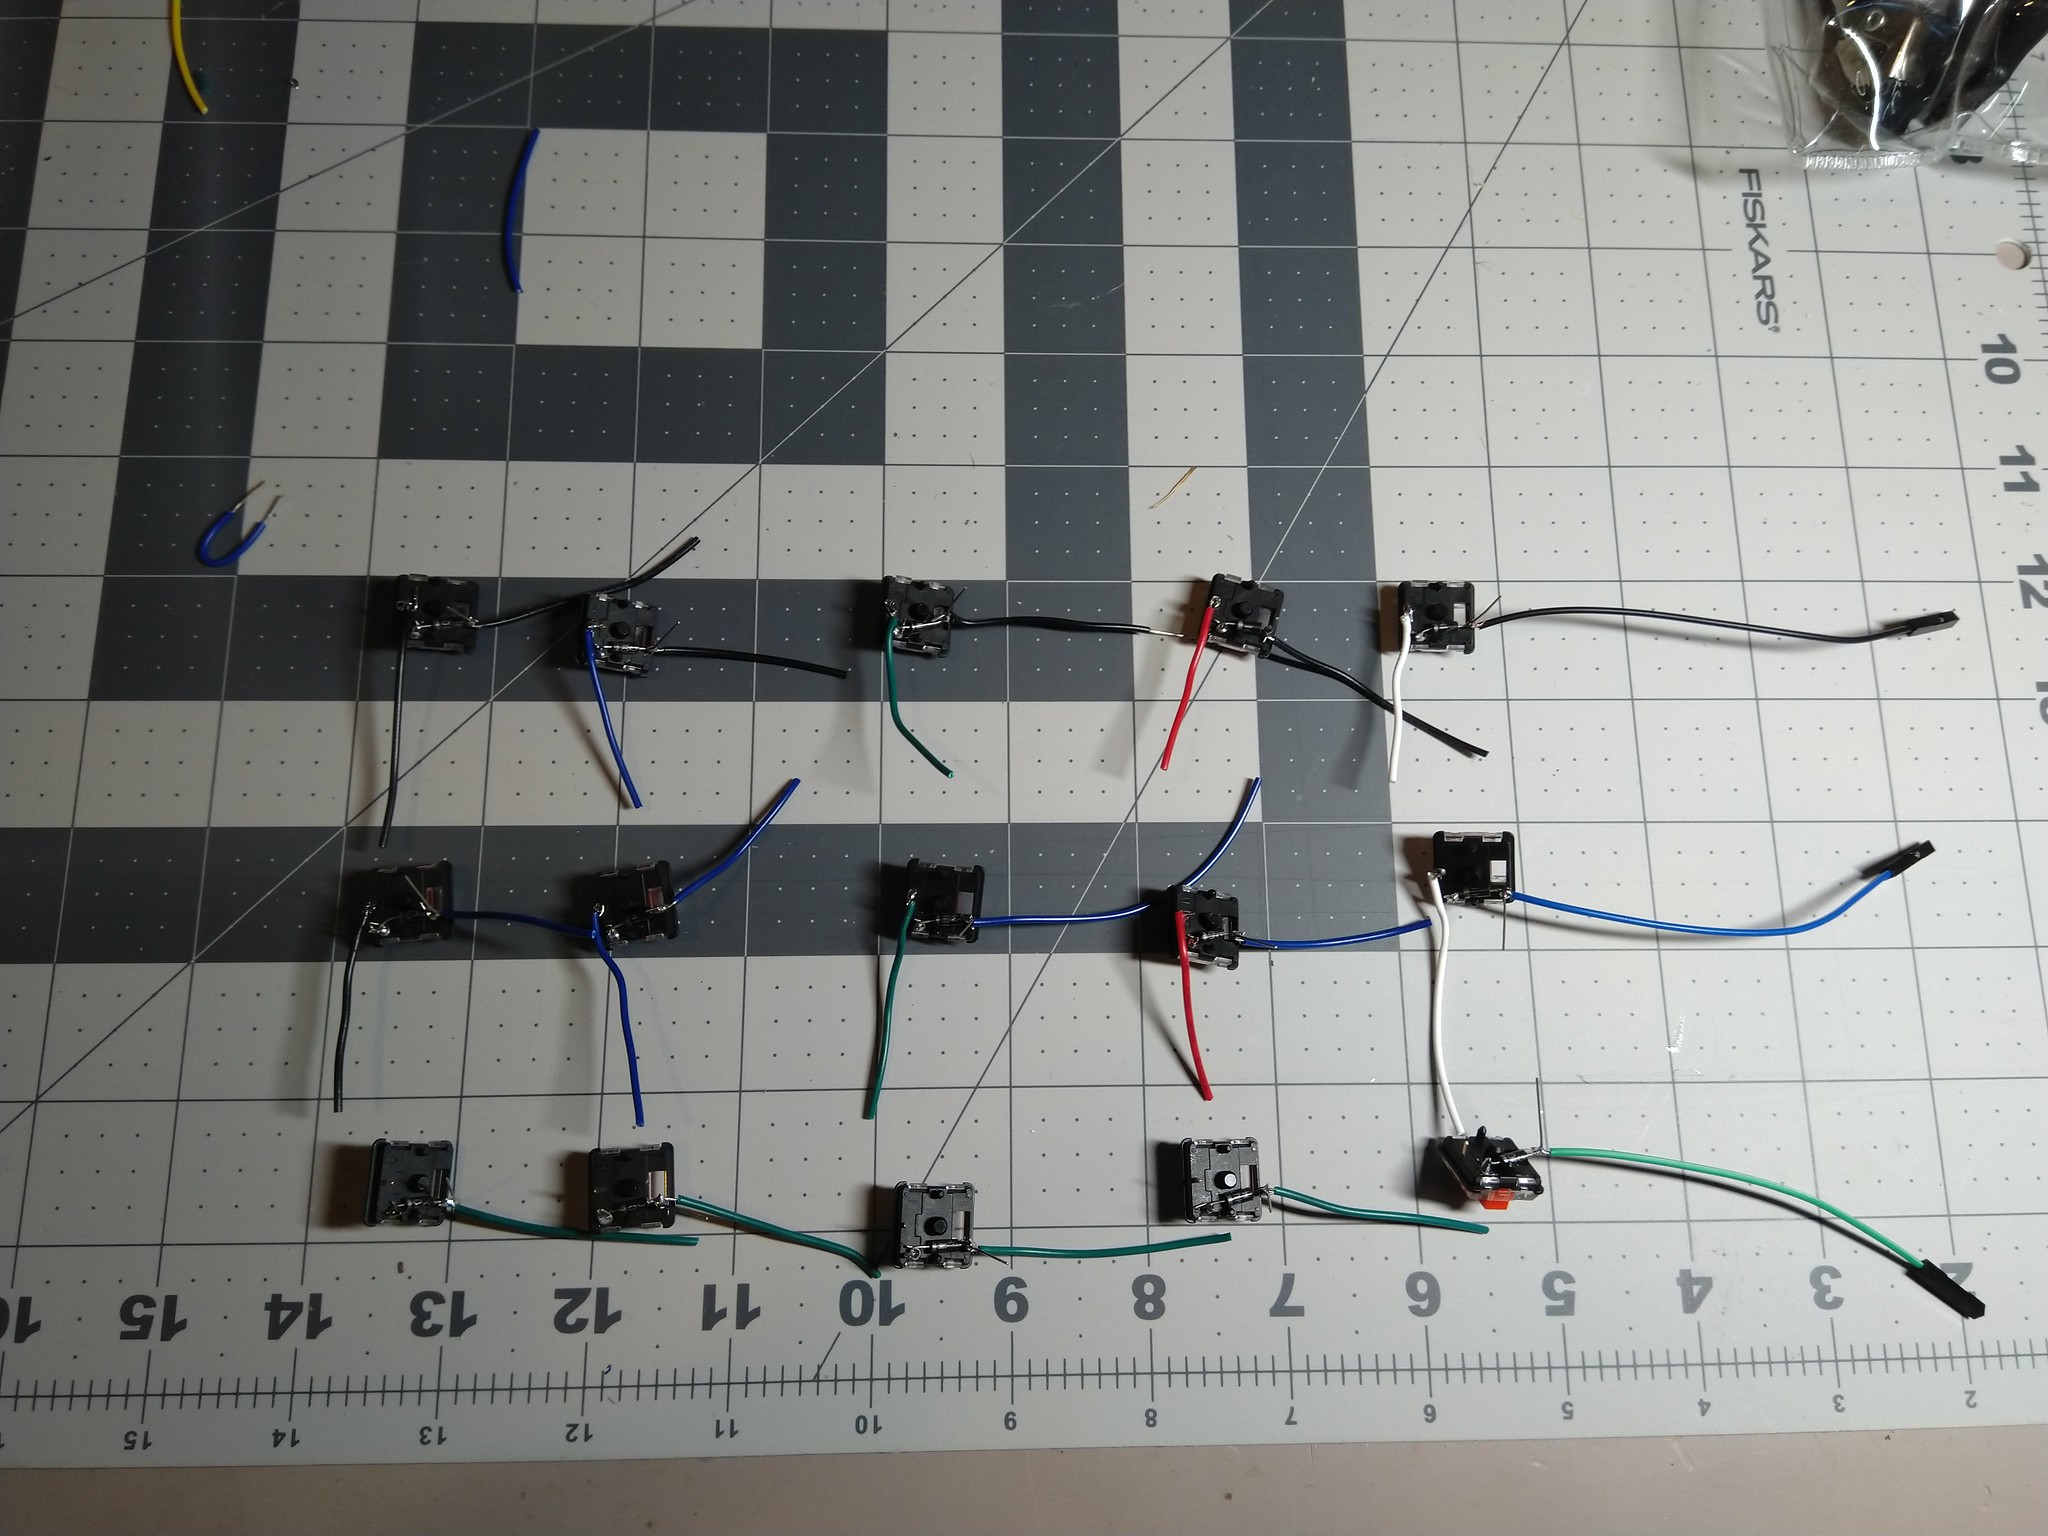
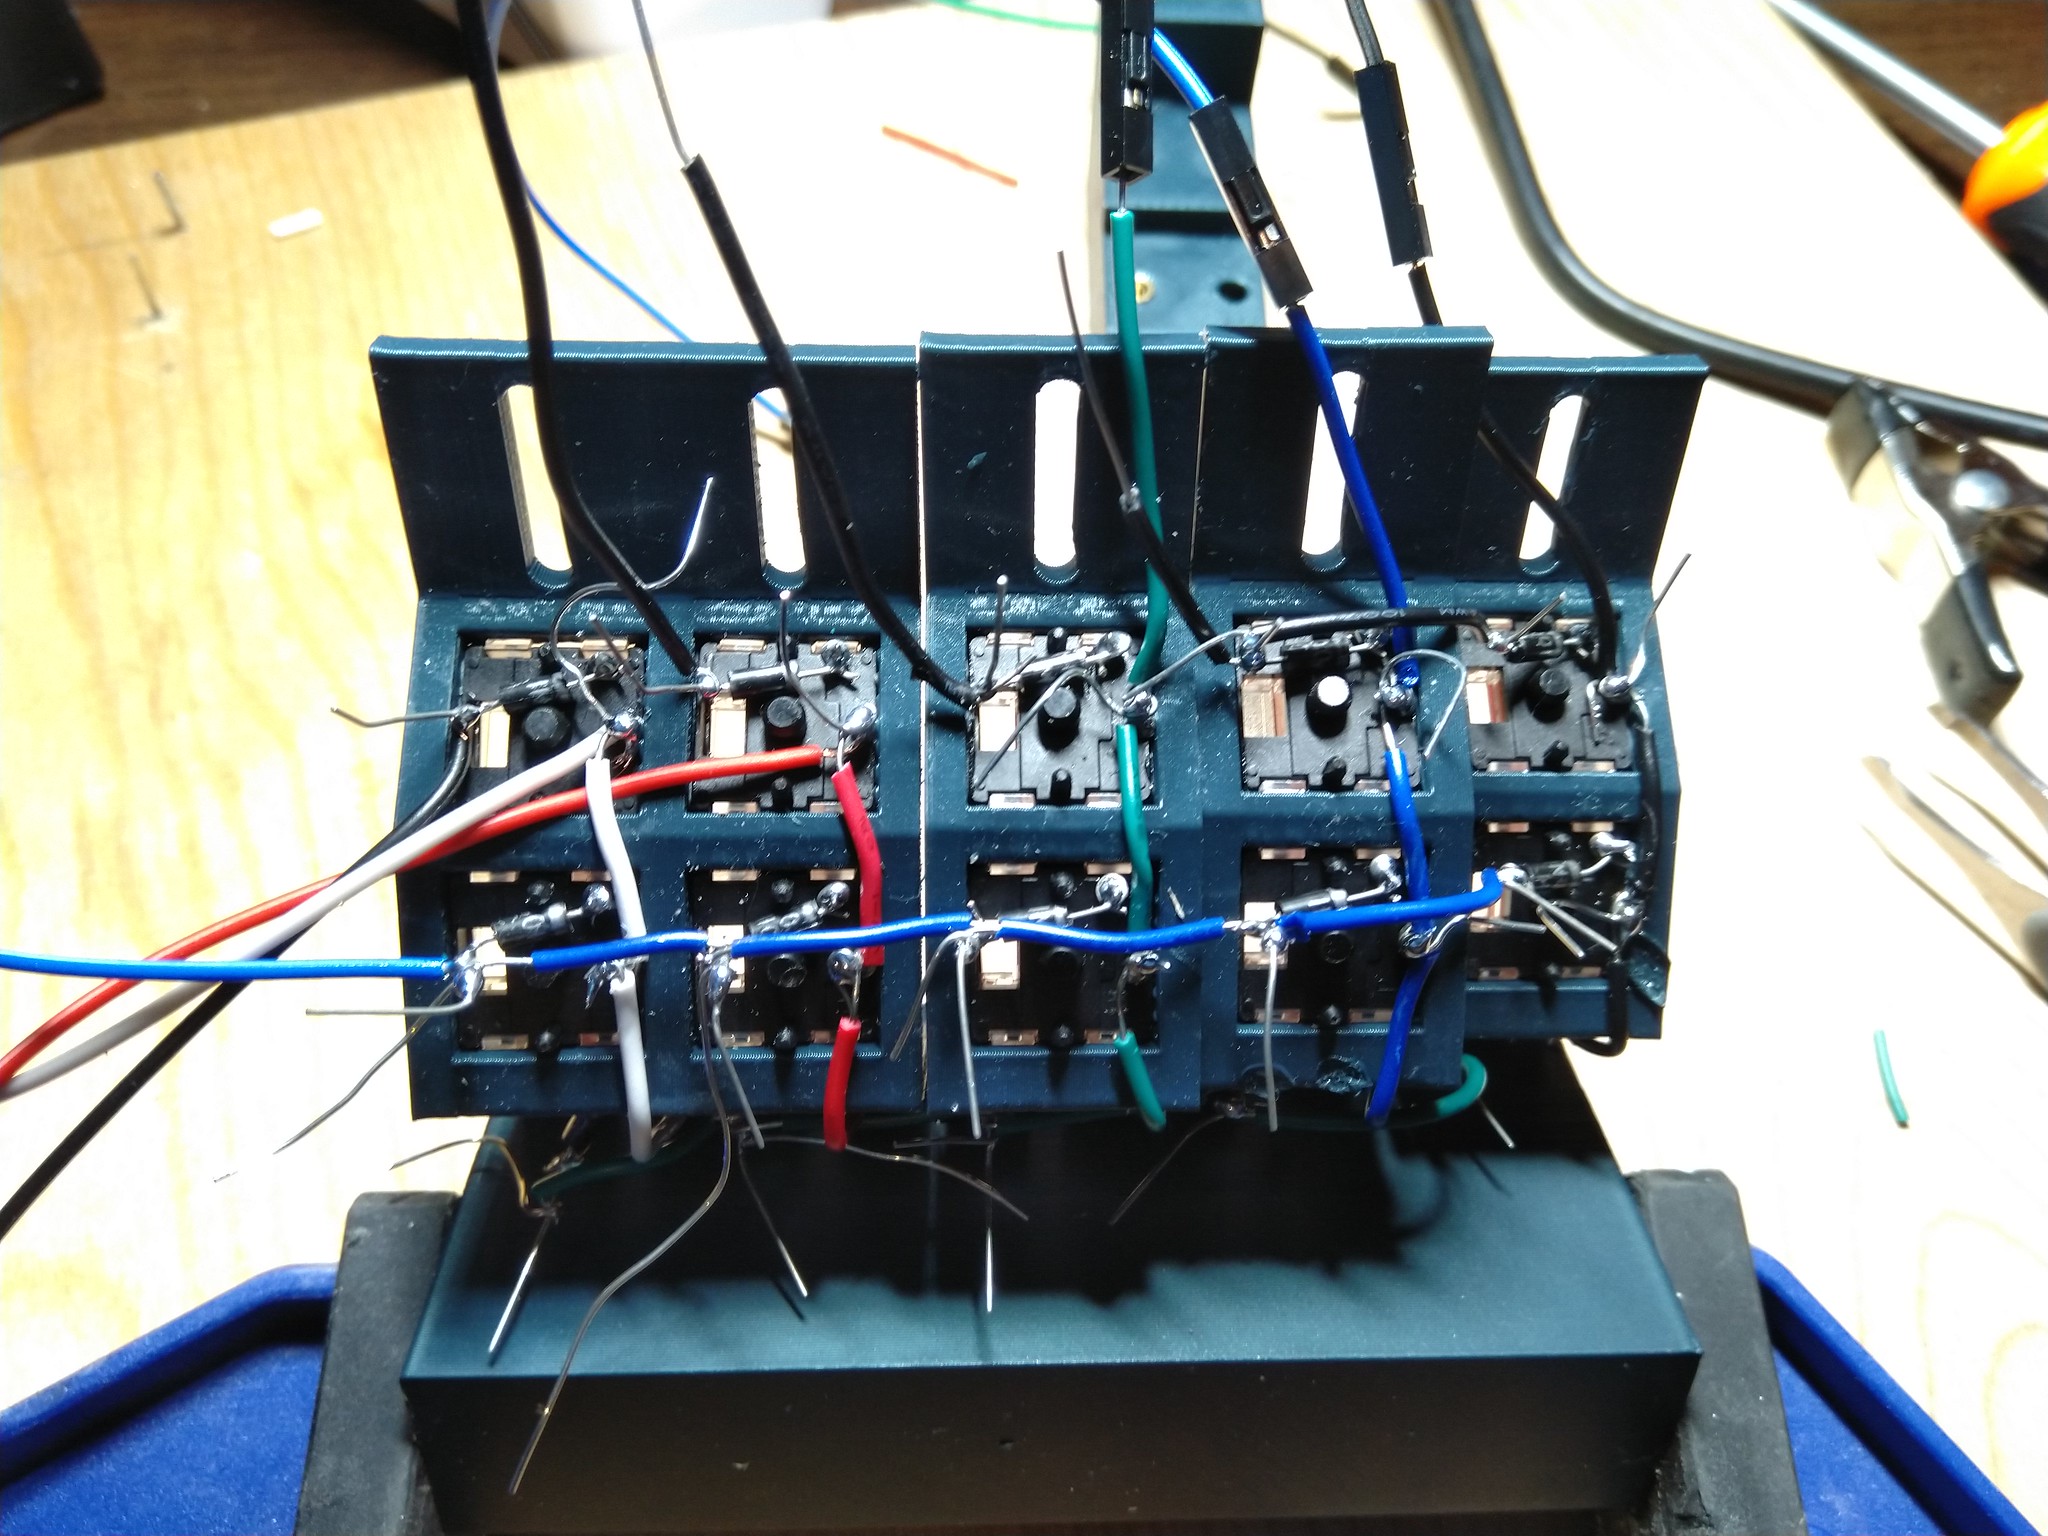
Wiring and Soldering
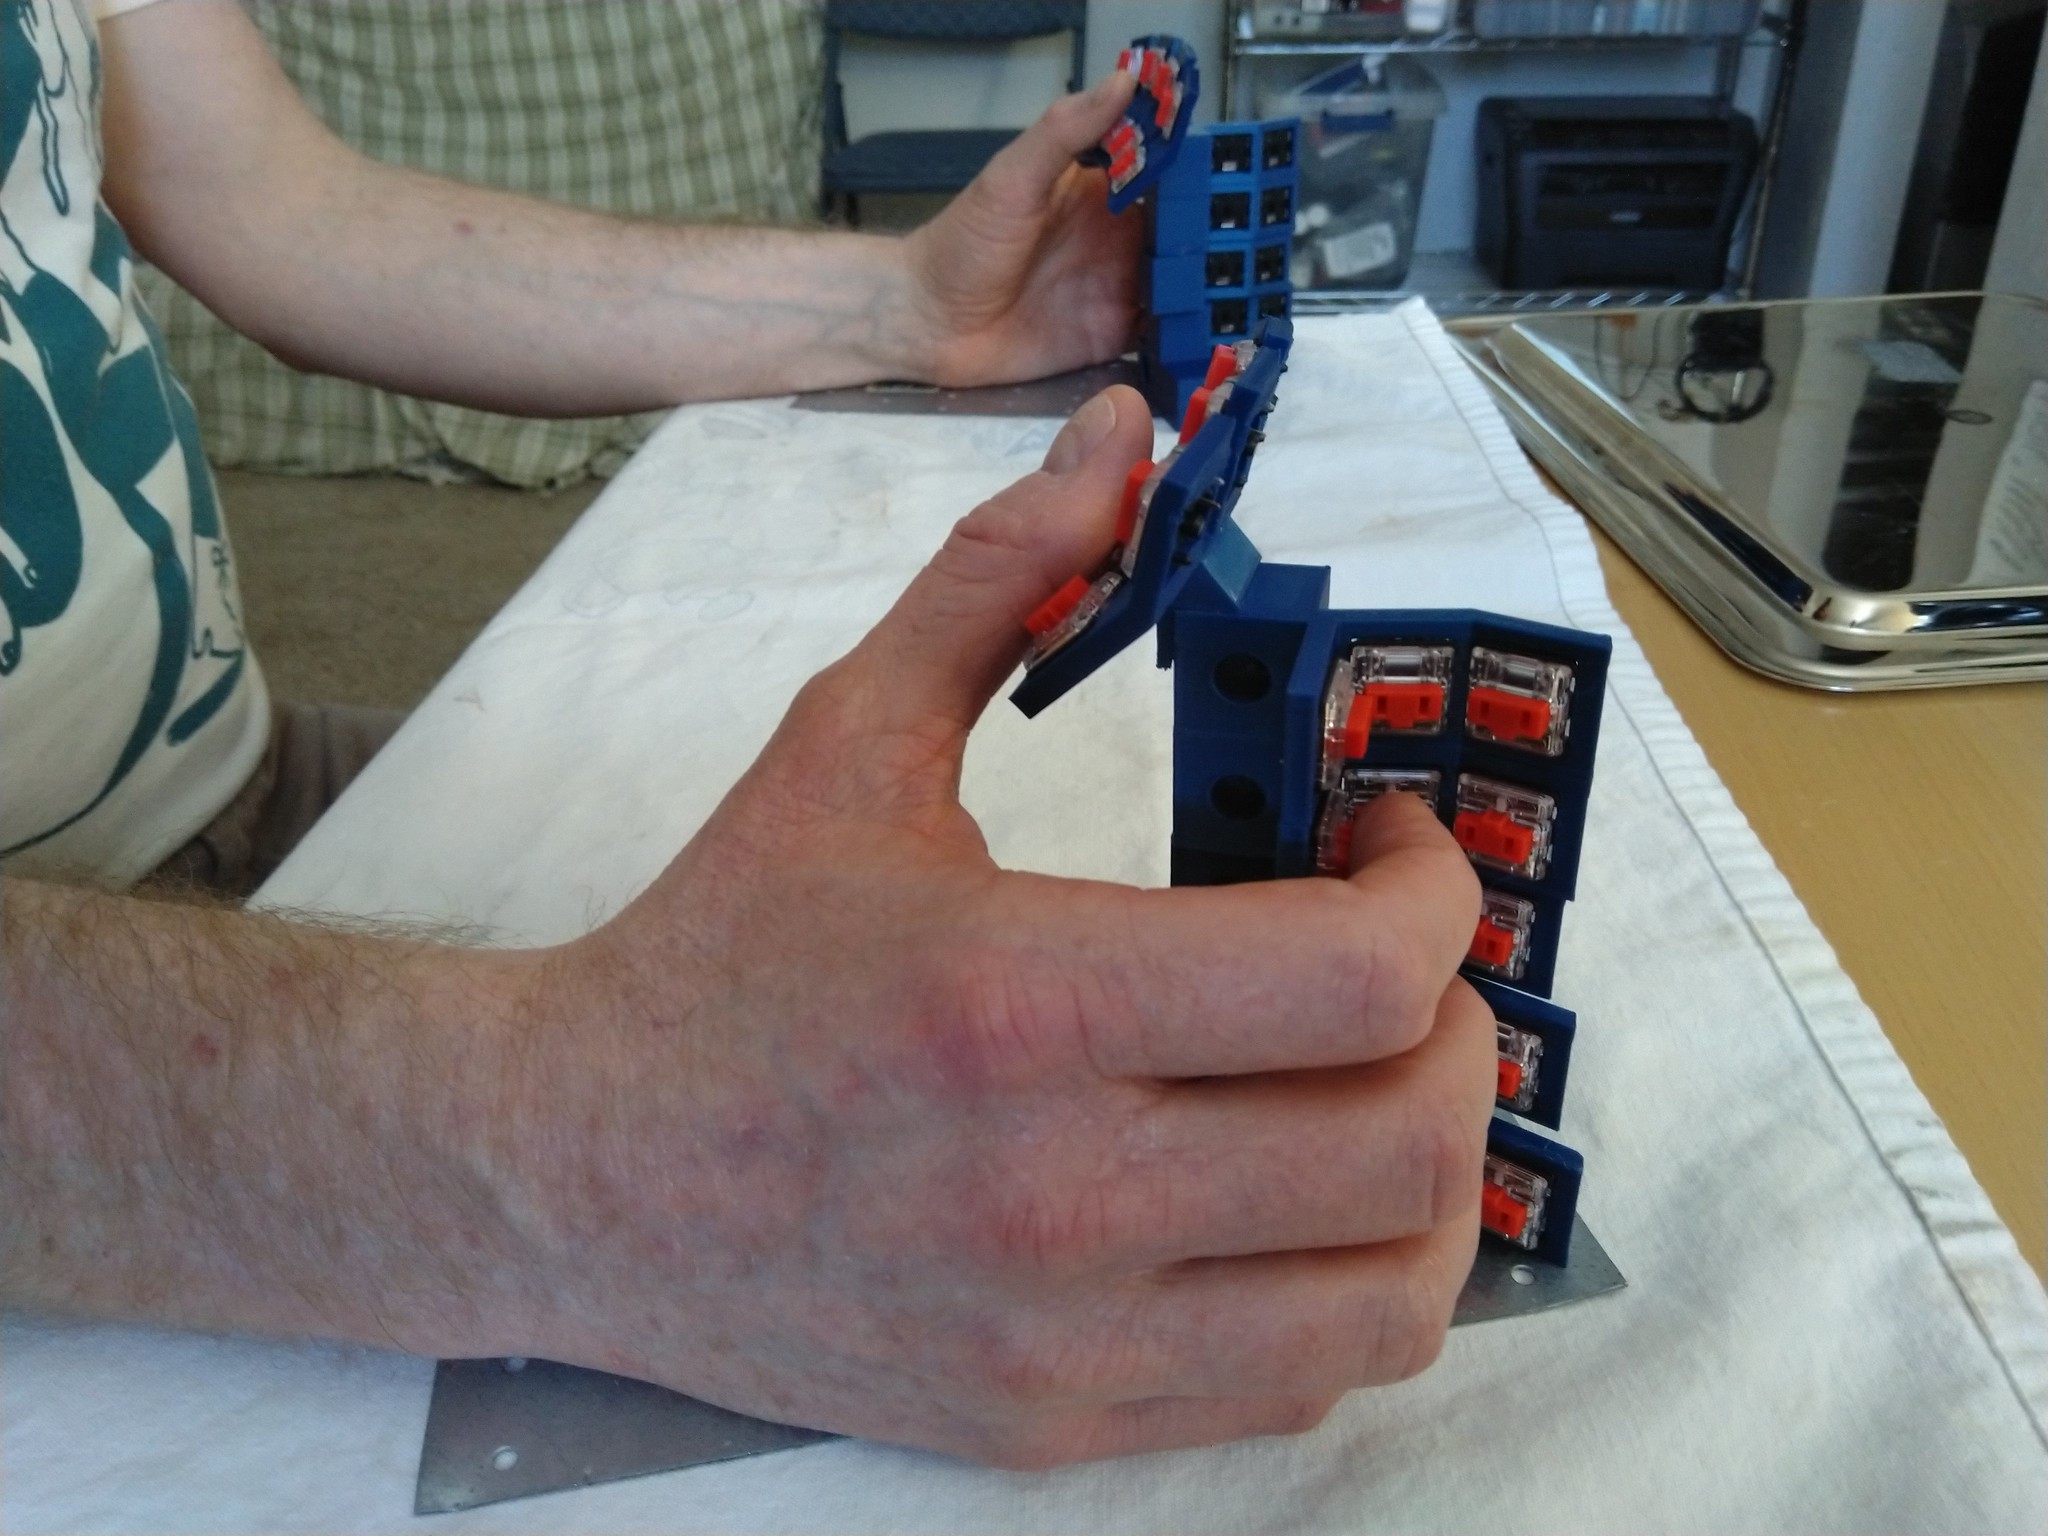
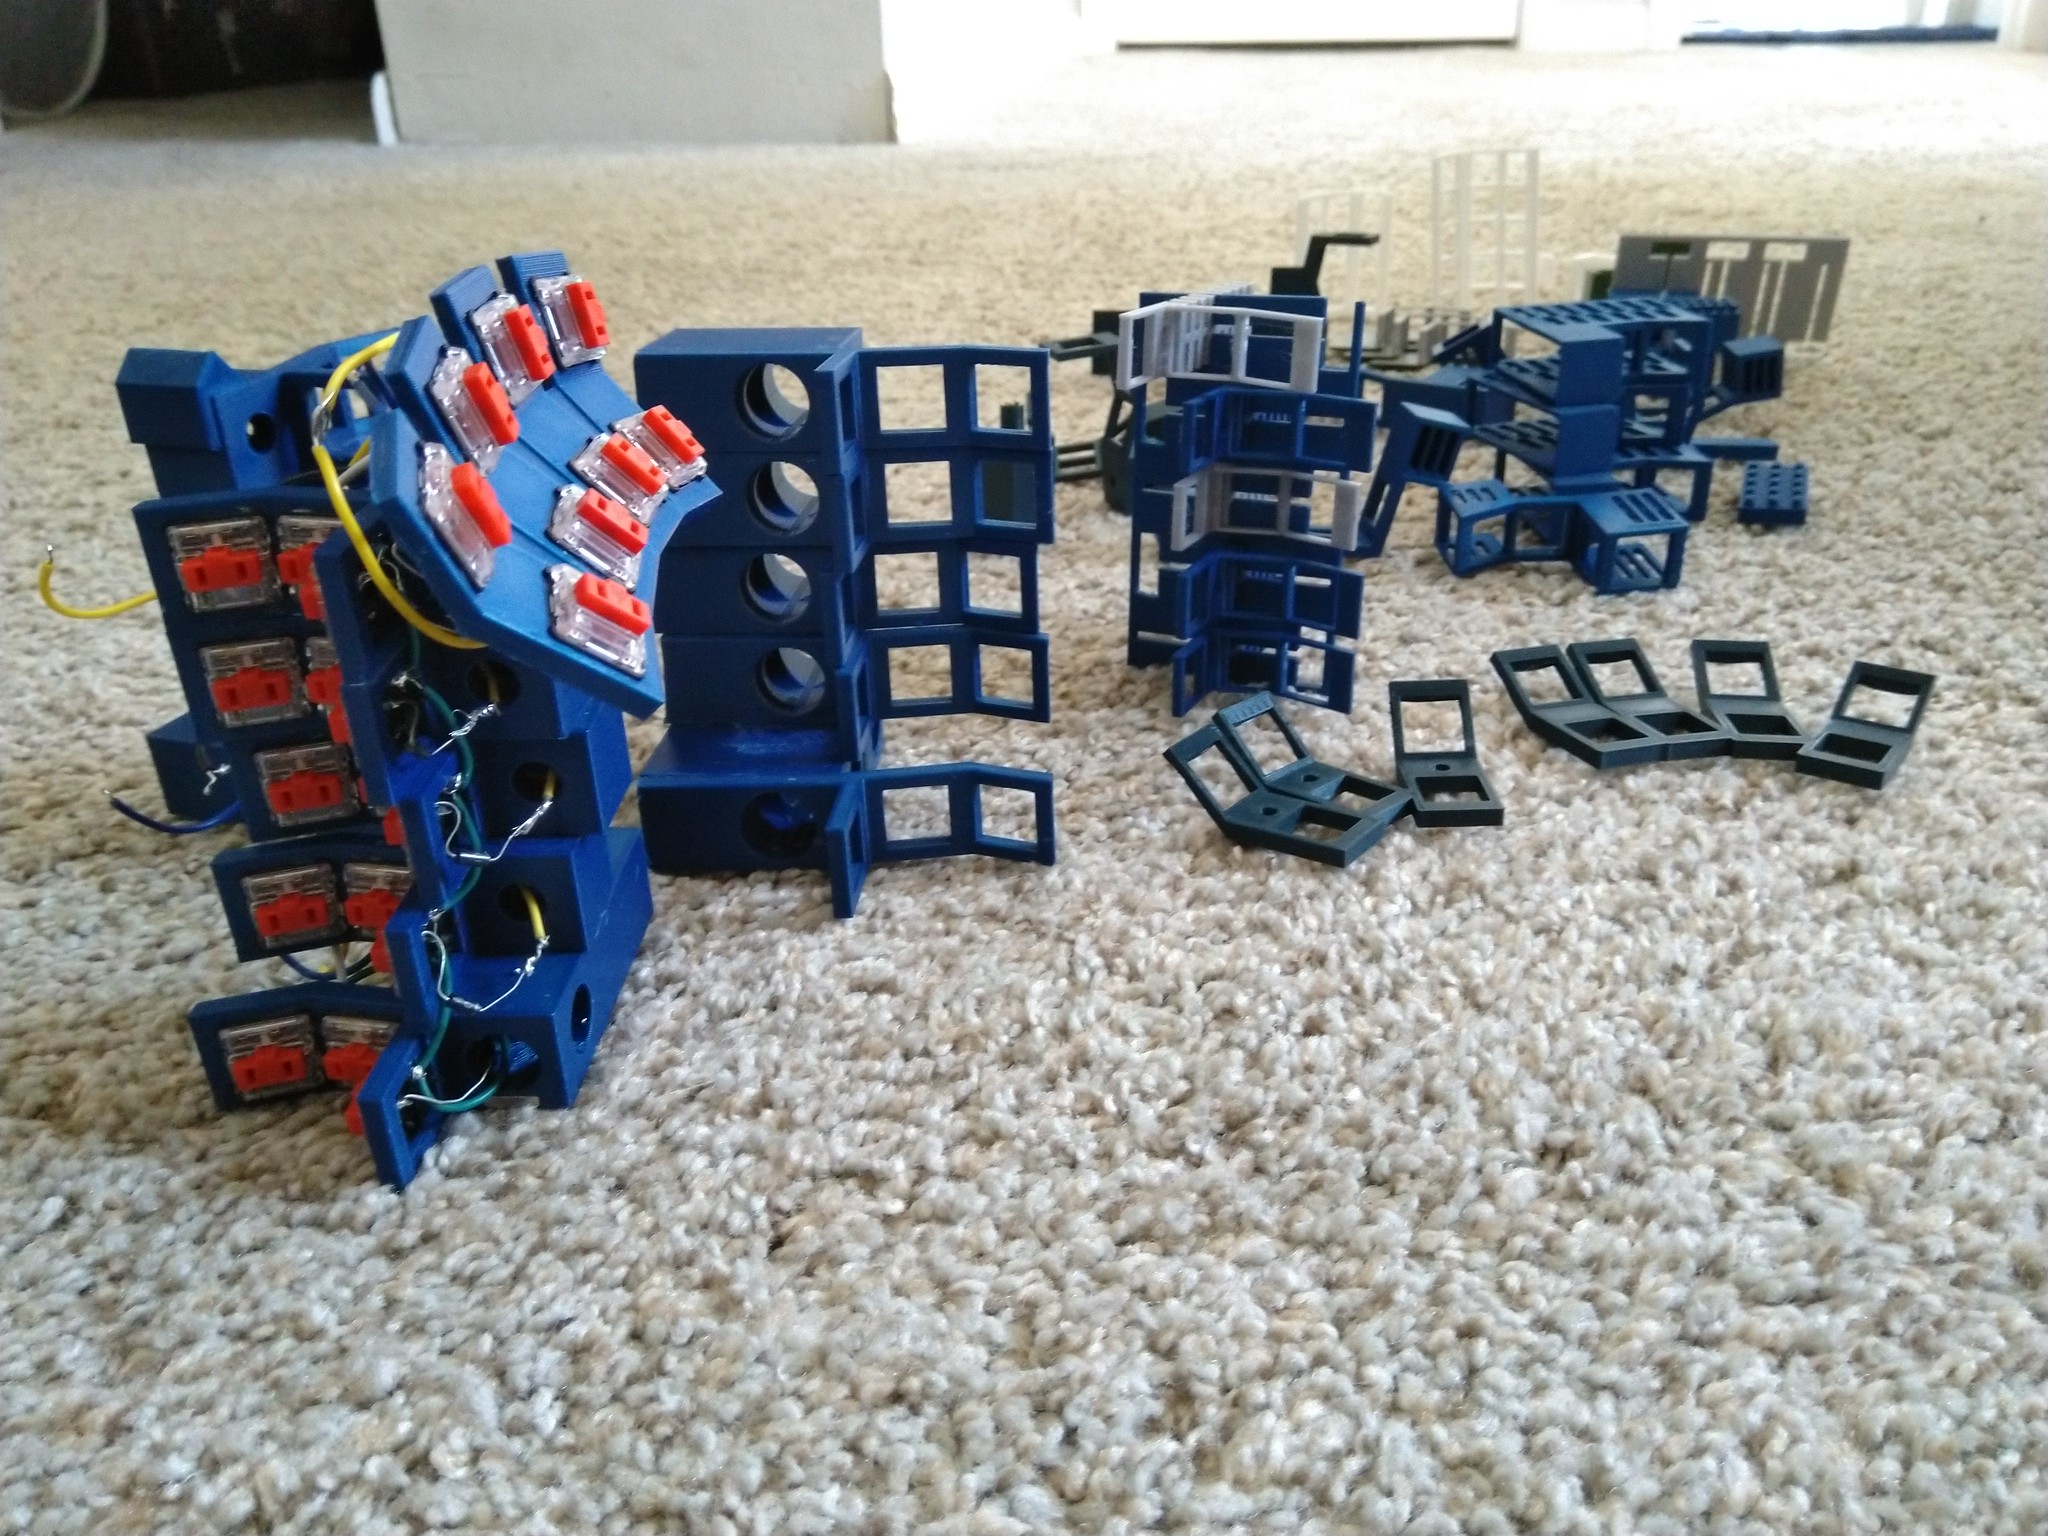
Some of my early prototypes were super exciting to me. Like this one that was a vertical stack and adjusted in 2 directions with a series of aligning slots.
That is until I realized there was no way to get in there with a soldering iron and actually wire them up. I had to discard several variations before landing on something that was actually possible to solder.
The current design with the walls detachable from the finger columns also facilitates hand wiring while keeping the frustration level manageable. I did 3 solder operations on each switch with the switch completely out of the case, and only after that did I glue them into their positions. That helps a lot. Then, wiring can proceed with only one wall bolted on at a time so the other side has plenty of clearance for the soldering iron and manipulating the wires by hand.
Keywells below wrist rest
For the most comfortable geometry given the need to do a trigger pull motion to type the bottom row, the squeezebox requires a tall wrist rest that allows your fingers to hang over the edge and contact the keywells in what would be a recessed area below the desk surface if this was on a desk.
Lap tray
Somewhat accidentally while dealing with the clutter of 2 split keyboards on my desk, I set the squeezebox's tray across my lap to make room and in that process realized I could line up my chair's arm wrests with the wrist rests and get a very comfortable posture going. The chair arm wrests support my forearms and the wrist wrests are directly in front of them at the same height. The tray also affords a surface for the mouse in the middle. So for now I'm planning to use the lap tray as my primary posture. But it works well enough on the desk too.
3D Printing
This version is 6 distinct parts. I connect them up by putting holes in the surfaces where I can install a metal threaded insert and connect things up with M3 bolts. I've never used threaded inserts in 3D printing before and they work great are super easy to model and super easy to install with a soldering iron. I love them and will be incorporating them a lot in future projects.
Nothing here needs supports when sliced. I print the finger columns on their sides and my Prusa Mini+ can bridge across the 13.8mm switch square just fine. There's some extra/redundant symmetry in the staggered walls such that a single part works in any of the 4 positions. I printed a little washer for the bolt that holds the Elite-C microcontroller in place so the bolt head wouldn't short circuit the PCB pads below it.
The growth in my modeling skills during the project was highly noticeable. Early parts and prototypes took hours and hours in FreeCAD and many restarts and a smattering of file revisions in git. By the end I think I modeled the inner wall that has housings for the RJ-9 jack, the microcontroller, and the USB-C port in under and hour and the second print/iteration was good enough to keep and use.
One thing that is super handy, and probably fairly obvious if you are clever, but I definitely did not understand at the beginning is that for a symmetric split keyboard, almost all the right/left differences can be handled by mirroring the Z axis in the slicer software. That means in the CAD program you can just model one half and you're done.
The Learning Curve
Overall this is not wildly different than my current daily driver ergodox, especially since I've gradually been reducing the number of keys I use on my ergodox over the years as I learn more QMK features and keymap techniques. However, it's radical enough to reduce my typing speed down from like 60 WPM to 20 WPM. I haven't spent much time at all yet typing and I'm very much still figuring out my keymap around punctuation and a few other areas. I'm confident I'll get the speed and accuracy to switch to this as my daily driver but it may take a week or two of typing practice in the evening after work.
More parts details
The switches are Kaihl Choc Reds which are linear, low-profile, low activation force, and quiet. The microcontrollers are Elite-C. The hands are interconnected via RJ-9 cable and soft serial configuration. Threaded inserts are for M3 bolts. Mostly it's a by-the-book handwired keeb approach.
Key Mappings
I've been getting RSI pains from pinky reaching to the outer column and chording shift on my ergodox, so I have been very motivated to reduce use of pinky drastically and move more work to the thumb, so there's no column outward from the pinky. Shift and control/escape go to the thumb (and/or QMK combos. Still WIP.) and tab goes on my navigation layer so the pinky only has basic letter duty. I'm likely to switch to a pinky-minimizing layout like BEAKL sometime soon but I didn't want to tackle that while also adjusting to the new hardware.
I kept one reachy innermost column because I wanted to keep a dvorak base layer and not have to immediately switch to something different. So that innermost column is really only there to ease my transition but I ultimately might make a layout that doesn't require it and ditches it. To reduce the distance I need to reach sideways, the 2 innermost columns are a single plate so the gap can be quite small about 2mm.
I'm still in flux with a lot of key things including modifiers. I've tried home row mods but with dvorak they are really prone to misfires on the right hand for rolls like th and ns, so I moved them to the bottom layer on my ergodox. But on the squeezebox putting mod-taps on the bottom row makes them ineligible for combos which cancels one of the main areas of potential for this design. I think next I'll try just mod-taps for ctrl and alt on the top row so I can do 1-finger combos across the middle and bottom rows. Having so many thumb keys provides a lot of great possibilities especially for stuff that's only occasionally used.
My QMK fork has my keymap if you want to dig into the details. There will be a lot of churn there in the coming weeks.
Typing video
Overall thoughts at the milestone of a working custom keyboard
This has been a super fun project. I've been wanting to do this since I first described the concept of the corner key to my fellow keeb/ergonomic tinkerer Michael Sloan back in January 2020. My CAD and 3D printing experience was very beginner level and I had never done proper parameterized CAD prior to this, just some TinkerCAD and SketchUp. Parameterization is absolutely required for this type of project so I studied the dactyl manuform software stack a bit (clojure, openscad) but ultimately modeled this in FreeCAD with good results.
This project took at least 2 months of substantial night/weekend attention and a huge amount of prototyping (details on that below). I had soldered a few keyboard kits before but never done any hand wiring and never done a custom QMK firmware config. I struggled a lot trying to flash the microcontrollers and understanding how the wiring maps to the firmware. I'm grateful to many folks on discord forums and slack who answered questions for me and enabled me to overcome obstacles on a weekly basis.
Plans for the next revision
The main thing I'm dissatisfied with in this version is the angle between top and middle row for ring and middle fingers is too steep. I can't properly type the top row with the point of my finger as intended. Instead, my fingernail ends up scraping the keycap. This is a consequence of starting out designing for a vertical joystick style orientation, where that angle works OK. But I switched back to horizontal in the process and didn't realize that would actually affect the geometry here. It's great for index and pinky which is a bit odd but anyway in the next revision the ring and middle finger top row will be nearly flat like 170 degrees.
I've added slots for bar magnets so I can mount the keyboard and wrist rests to a steel plate which will be adhered to a 1/2" plywood board for the lap tray. I may switch to a flat RJ-9 cable instead of coiled so I can staple it to the board and route it along the edge leaving the center part of the tray fully clear for the mouse (or coffee when on the desk).
I didn't really account for a physical reset button in this design as I figured I would have a reset key in my keymap. That turned out to be quite optimistic so I just hacked one in there and it's dangling around on wires. I'll give it a proper home in the next version. I was expecting the QMK tweaking and flashing to be a fairly quick process needing just a few flashes to get it and hoo boy was I wrong. I spent several full weekends debugging weird behavior and going from things like 39 of the 42 keys work to suddenly no keys work to suddenly only the bottom row works, to everything works but it's all backward, etc.
I'll add a simple outer wall that will bolt onto the main walls with threaded inserts. This will ensure the whole assembly goes together square.
I think I'm going to give the thumb cluster a proper full revision. I think I want the top row keys right next to each other like a tri-fold science fair display.
I have a spool of black prusament PLA set aside for the next printing and I think it's going to look great with the choc red switch stems.
Weeks and weeks of prototyping
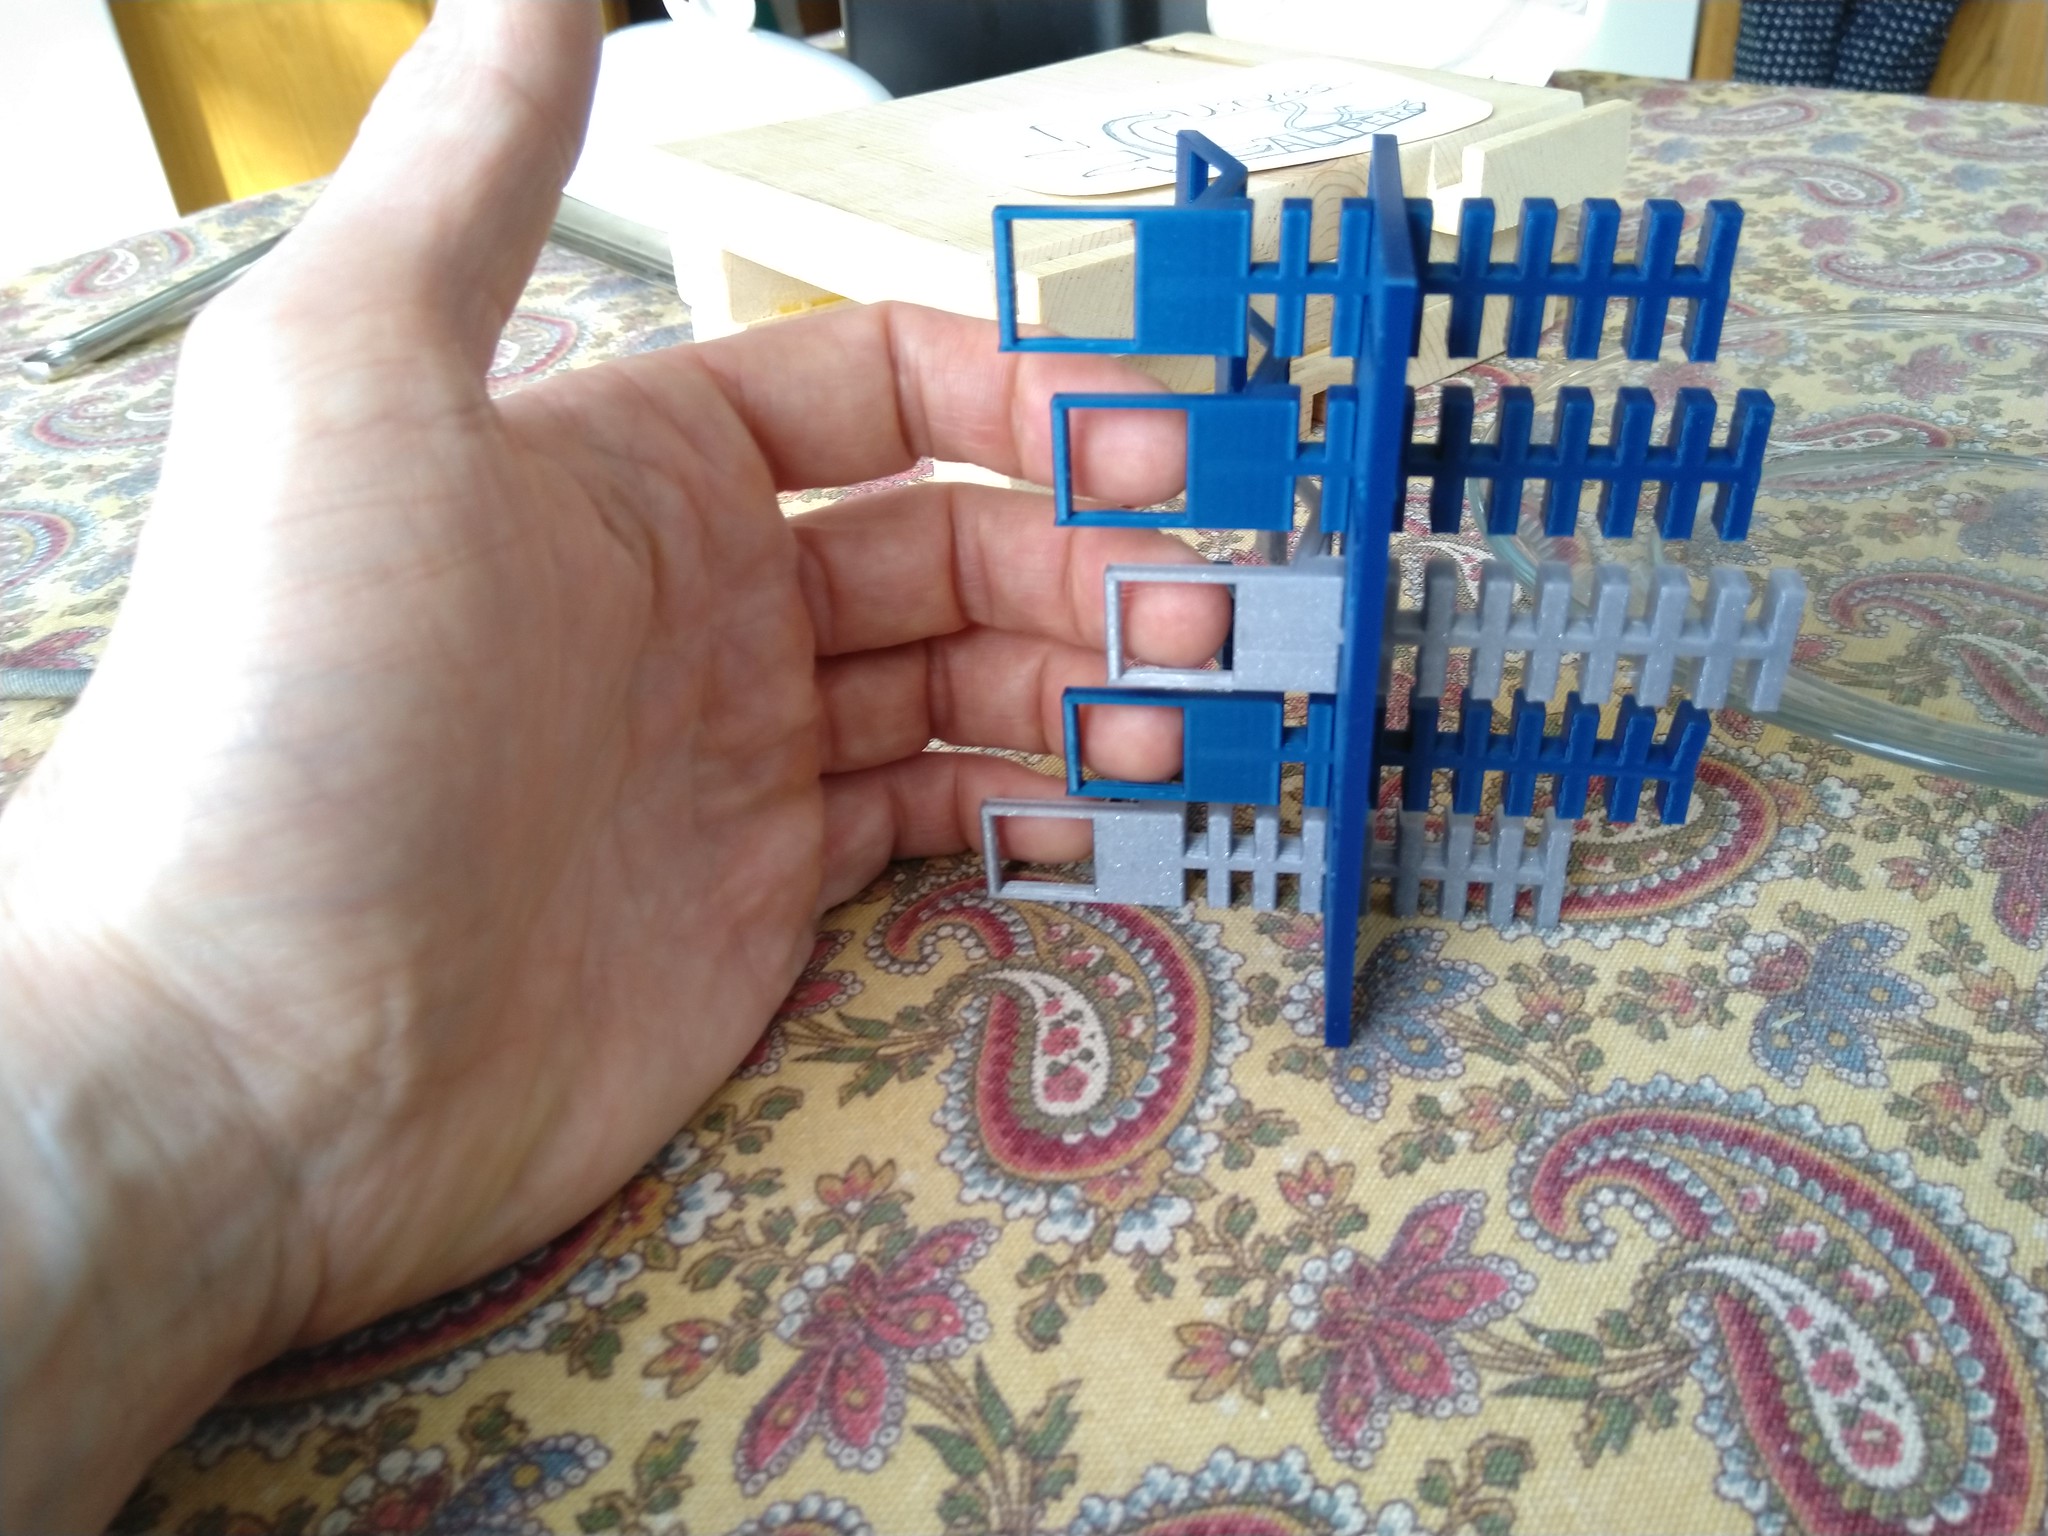
So my original conception was for this to be a vertical design used in joystick orientation similar to Victor Eikman's Concertina. After a lot of prototyping I decided to back off that requirement which added a lot of challenges and go for typical horizontal layout flat on the desk with optional tenting.
So the name "squeezebox" was originally because of the hand orientation and tight grid of buttons made it a lot like an accordion or concertina. Squeezebox is an informal name for an instrument like that. Even after switching to a horizontal design I decided to keep the name because the cases ended up very boxy and the corner keys have a trigger squeeze actuation motion so it still seems like an appropriate name.
I was also really interested in vertical orientation combined with more trigger-squeeze activation as I have a background in saxophone and I wanted to bring some of that motion to my typing.
Getting the main finger columns laid out right was really tricky. I was just learning parametric 3D modeling with FreeCAD too so I was struggling a bit with how to get my ideas into the software. The adjustable fit in 2 dimensions: forward and back as well as lower/higher went through a large number of prototypes and close to 2 full spools of 3D printer PLA filament. I had slotted designs, bolted designs, magnetic designs, glue designs, LEGO brick designs, etc. Some of these would have been difficult to wire up so making it feasible to hand wire became a major constraint once I got close to the positioning I wanted.
Full album of build photos
Uh, there are over 150 photos here. If you want to scan them more easily click through to open the gallery on a full flickr gallery page.